
Once you have chosen Task-Based Security in the Security Setup window, and assigned Security Roles and Tasks to the desired Authorizers, a Threshold ID must be created to enable Authorizers to authorize batches when requested.
Watch the video below for an example of a Threshold ID that enables authorization with signatures:
Before configuring your Authorization Threshold ID, you must assign the number of Authorizers (up to two) and the Authorization Task ID within the Security Setup window.
- Click on any of the text in the box below, as they become hyperlinks when hovered over and will expand the window:
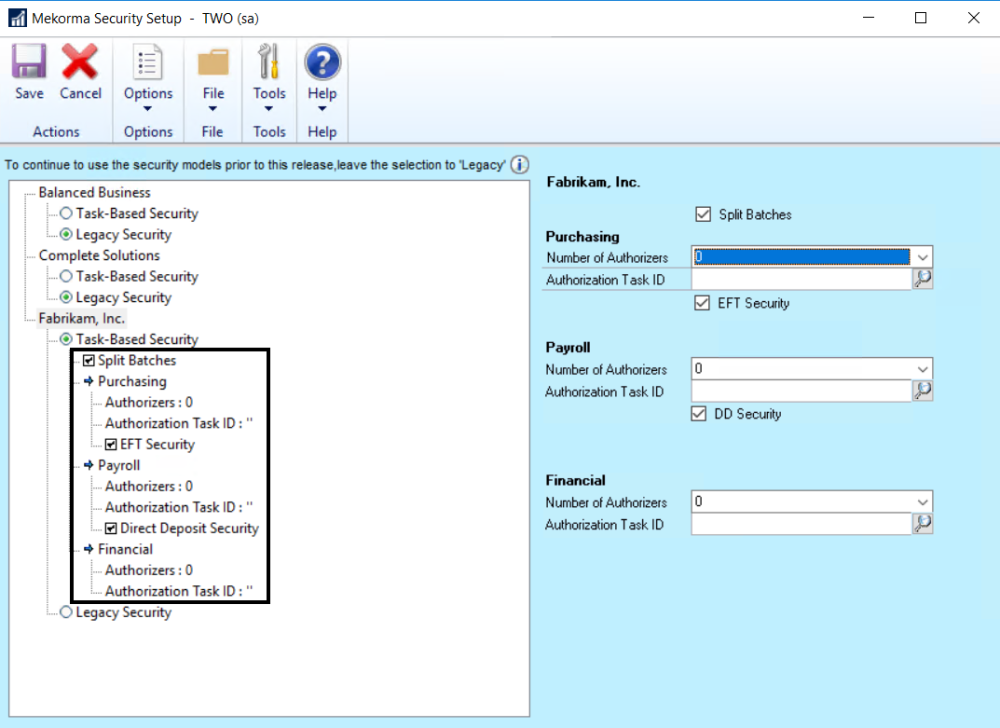
- In the expanded window area, decide which module(s) will need authorization assigned – Purchasing, Payroll, and/ or Financial (Miscellaneous Checks). Use the drop-down menu to choose the Number of Authorizers, and the look-up to define the appropriate Authorization Task ID. You can use the designated Mekorma Batch Authorizer Task ID designed for this purpose, as long as the corresponding Security Role has been assigned to the authorized users:

- Save these settings.
- Create a Threshold ID.
Example of a Threshold ID that enables batch authorization:
A Threshold ID allows you to save a series of threshold ranges, associated with default signatures, in the way that works best for your company. Threshold IDs are stored at the system-level, and can be assigned to checkbooks for cross-company use. Threshold IDs hold the logic that enables batch authorization to be applied to payment processes, and must be assigned to a checkbook in order to take effect.
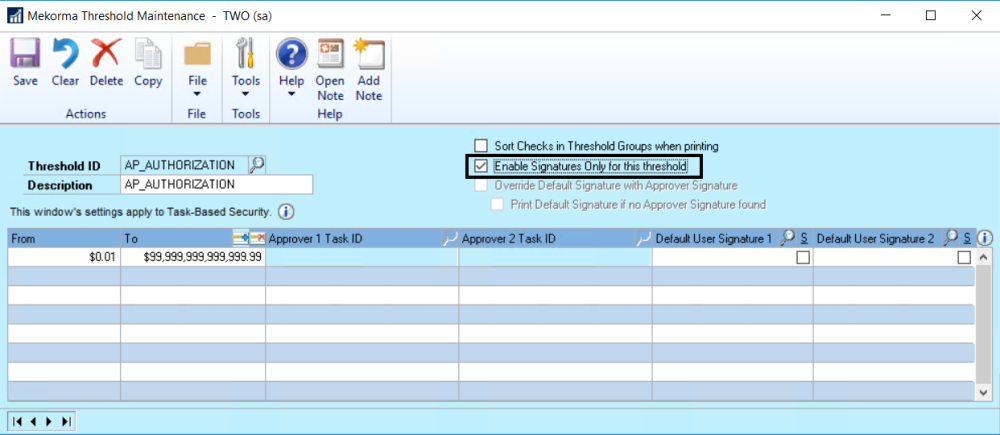
- Enter a name that identifies your configuration in the Threshold ID field (ex. AP_AUTHORIZATION). Adding a description is *optional.
- Tab off the Threshold ID name. The From and To amount fields automatically populate from 0.01 to the maximum dollar amount.
- Select Enable Signatures Only for this Threshold. This will disable the Approver Task ID fields, essentially disabling workflow.
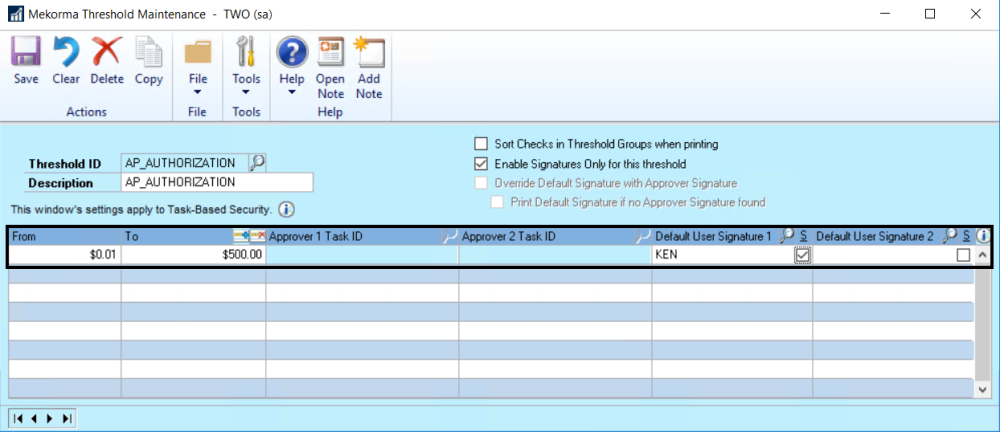
- Create the first threshold for your signature logic by typing the upper limit in the To field on the first line.
- Tab to the Default User Signature 1 field and use the look-up to choose the desired signature file for checks printed within that threshold range. If you want a signature line to be printed in addition to or instead of a signature file, check the Signature Line box.
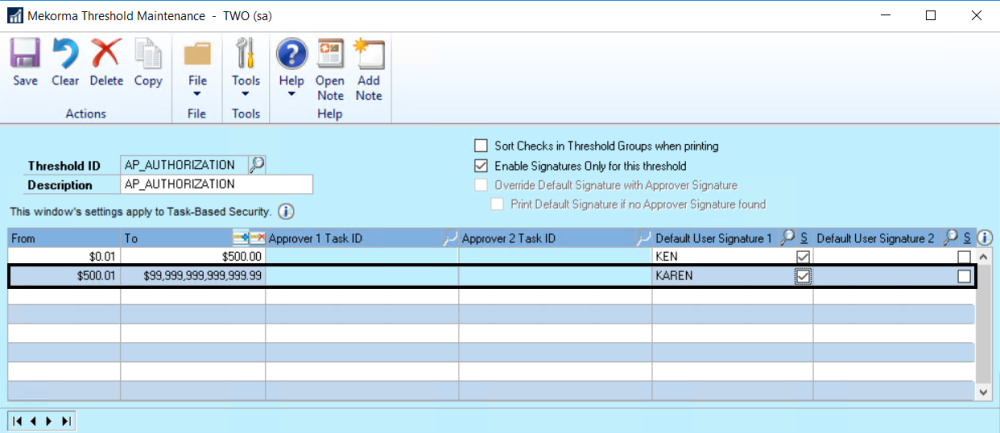
- When tabbing to the next line, the threshold will automatically readjust to the next possible monetary increment, so that there is never a dollar amount left out of your security configuration. In our example, for the second and final threshold, a different signature file will print on checks printed within this higher threshold range.
Need more help with this?
We value your input. Let us know which features you want to see in our products.