
Here are the step-by-step instructions, as recommended by Mekorma, to provide the digital signatures you want to print on your checks:
- Print out our Template for Gathering Signatures.
- Ask each check signer to reproduce their signature within a rectangle.
- Use your scanner equipment to scan each signed sheet of paper into a computer.
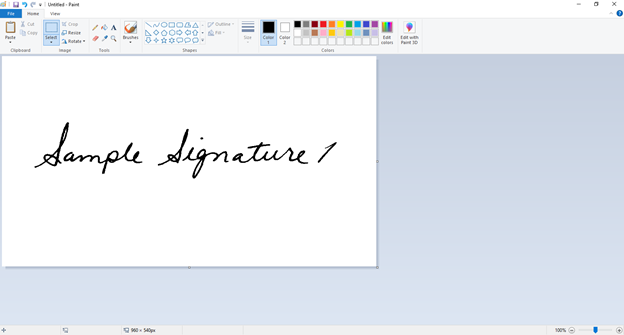
- Open the signatures one at a time in the Microsoft Paint application
![]()
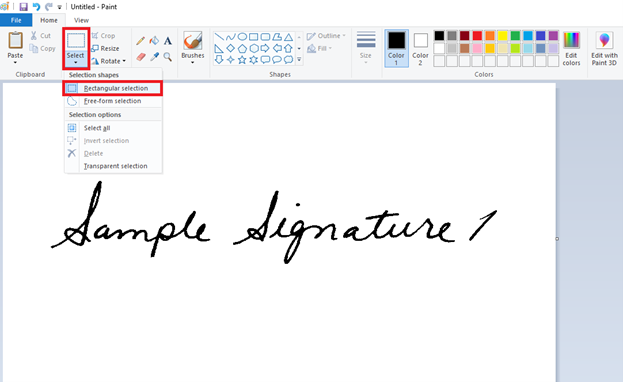
- With one of the signatures opened in Paint, click on the Select drop-down menu and choose Rectangular selection.
![]()
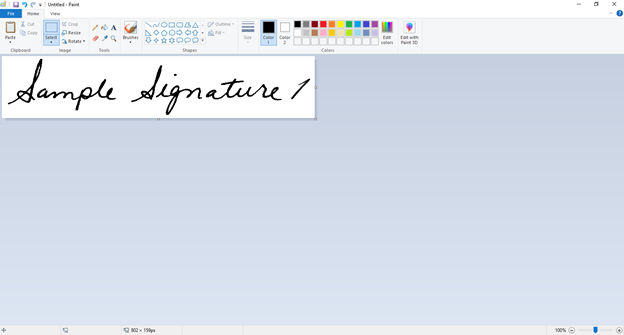
- Draw the selection box around the signature as closely as possible and then click Crop. The cropped signature should look similar to the example below:
![]()
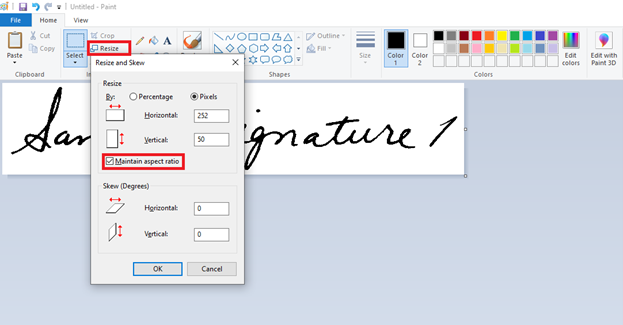
- In the Resize and Skew window, click on Resize and choose the Pixels radio button. Be sure that the Maintain aspect ratio checkmark is selected. Adjust either the horizontal or vertical dimensions.
![]()
A good choice for use in Microsoft Dynamics 365 Business Central is a signature file with approximate dimensions of 220 × 50 pixels.
- Click on the File menu option, then select Save to save your signature as a JPEG (jpg) or 16 Color Bitmap (bmp) file. These file formats produce the best results for check printing.
- Repeat the same procedure for all needed signatures, and store in a location accessible to an administrator for use within Microsoft Dynamics 365 Business Central.
Last modified:
January 17, 2023
Need more help with this?
We value your input. Let us know which features you want to see in our products.