
When you have one or more invoices ready to pay, navigate to Payment Journals and select your remote payment service provider—in this scenario, Corpay—from the General Journal Template List to create a Remote Payment Services-specific payment batch.

You now have a new batch ready to start submitting invoices to.
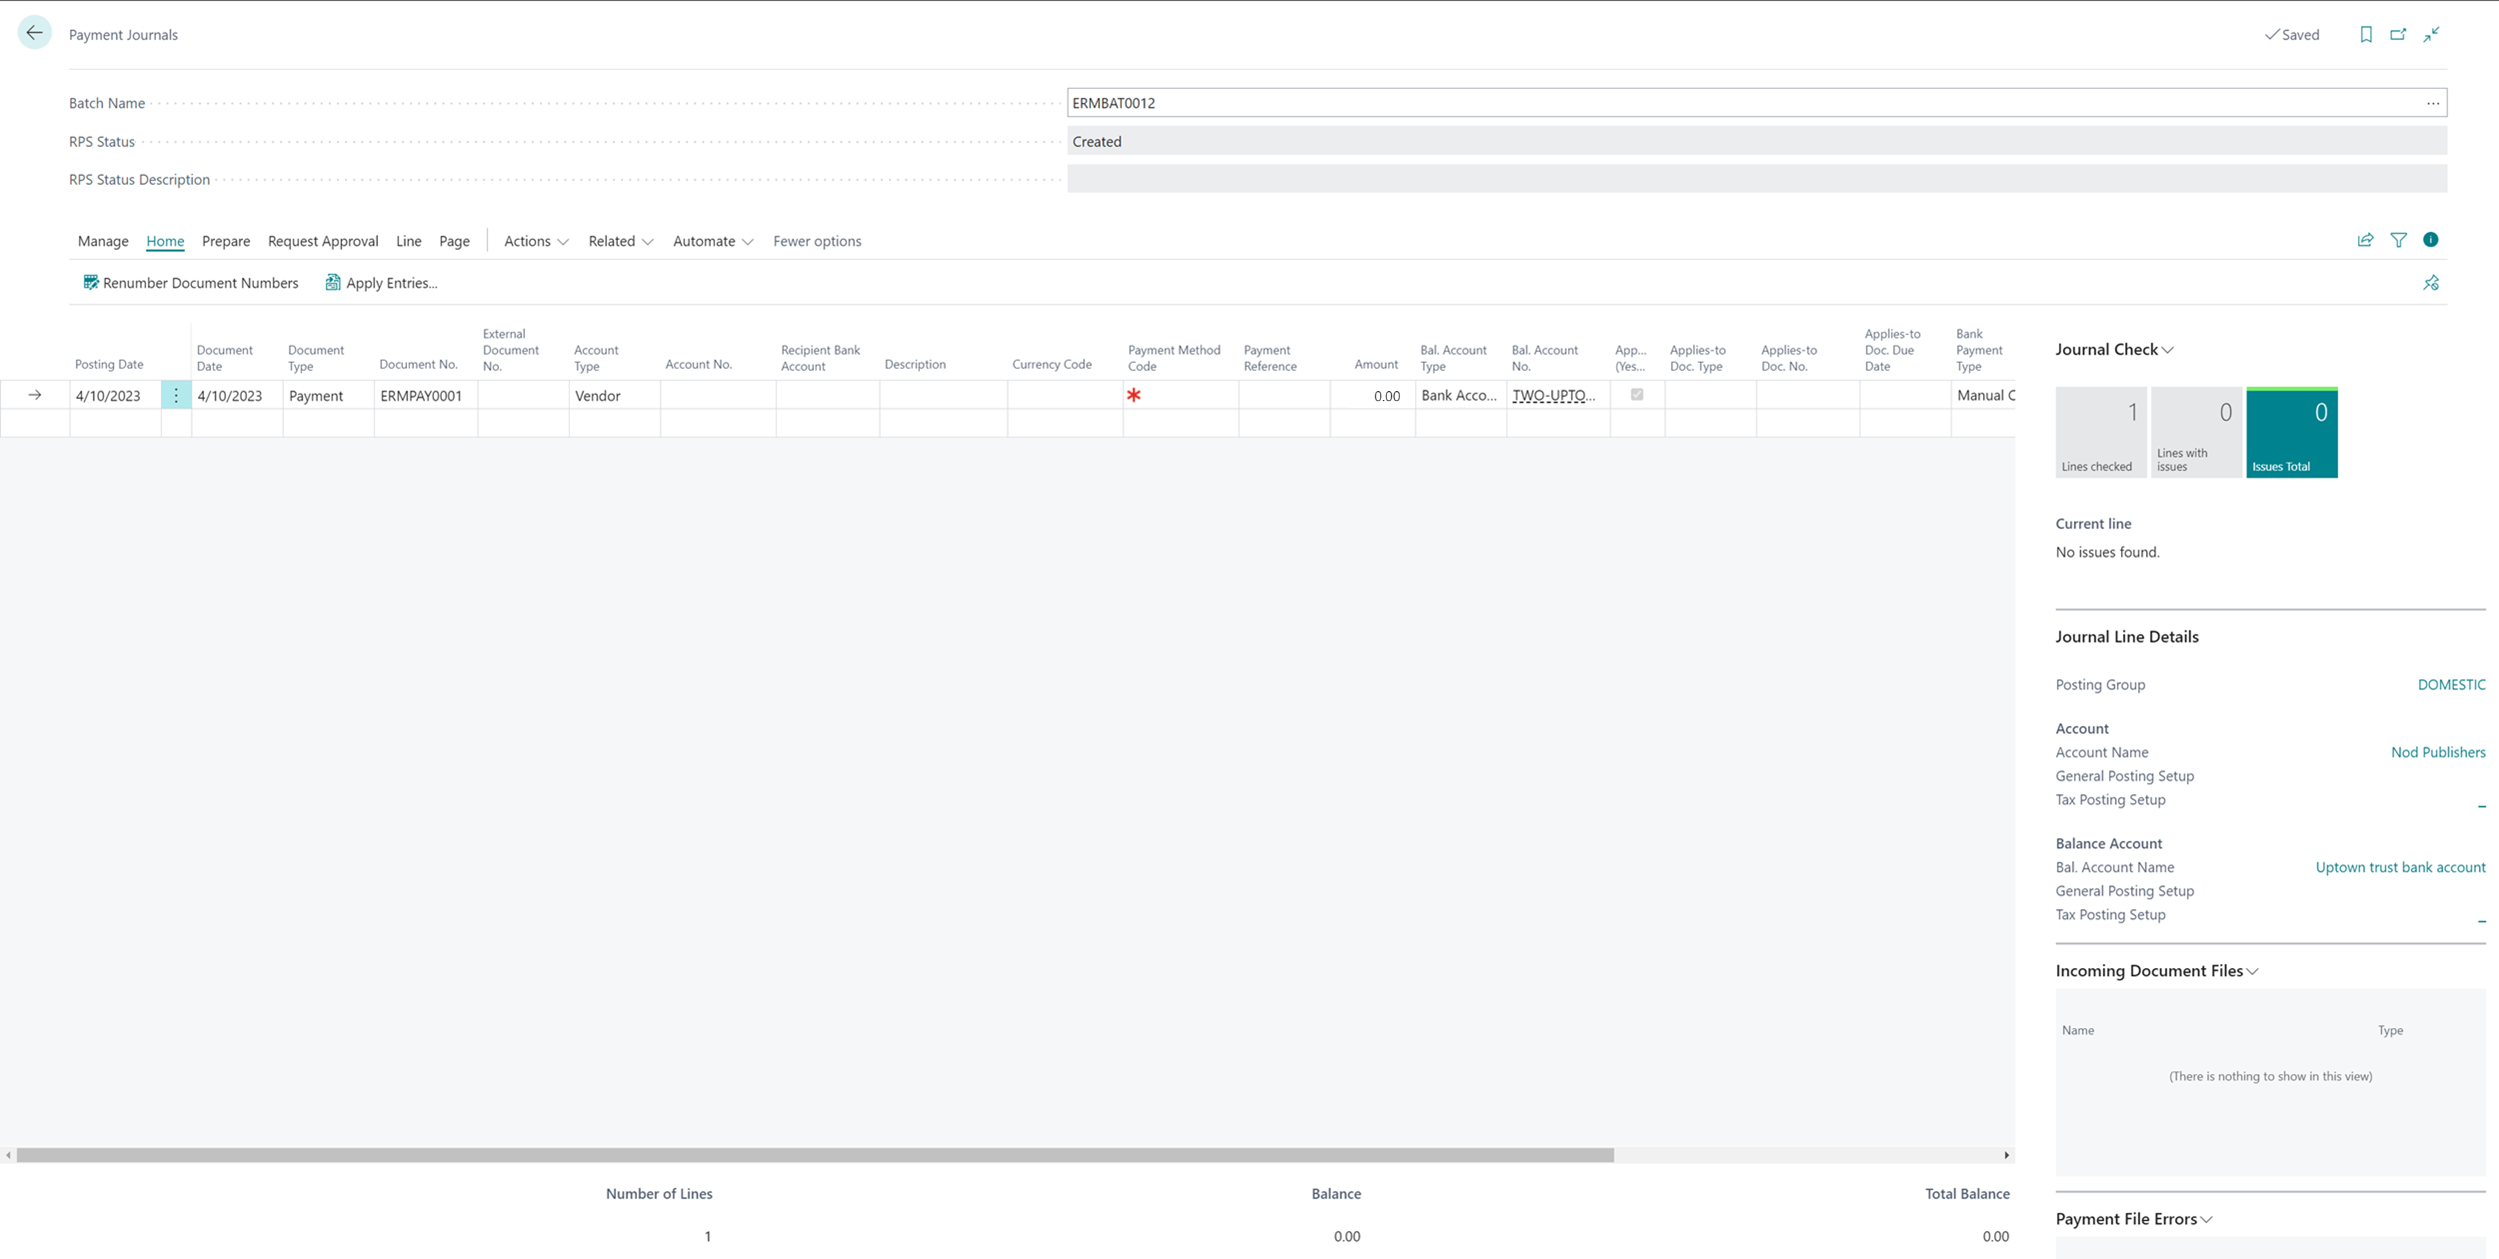
When submitting remote payment services payments, the Payment Journals page functions similarly to standard payments, with a few key differences: the top fields contain the batch name, status, and description.
- Batch Name is automatically created according to your batch numbering sequence configuration. In this case, our batch name is ERMBAT0012.
- RPS Status:
- Created: batch created and awaiting processing/submission
- Processing: submitted to Remote Payment Services but awaiting a response
- Processed: successfully submitted to and processed by the remote payment service provider and the payment batch can now be posted in Dynamics 365 Business Central.
- RPS Status Description defines the current status of the payment batch. It provides additional information when a Remote Payment Services submission failure occurs.
The steps below walk you through submitting remote payments using Mekorma Remote Payment Services by creating a new payment line:
- In the Account No. field, enter the vendor number for whom you would like to pay, which updates the Description and Bank Payment Type fields. It is important to note that vendors that have been excluded from remote payments (on the Vendor card) will not be valid selections here.
![]()

- Next, apply the invoice(s) for the payment line. Click Apply Entries from the header menu and in the Apply Vendor Entries page that displays, select the invoice(s) you want to submit to Remote Payment Services.
![]()
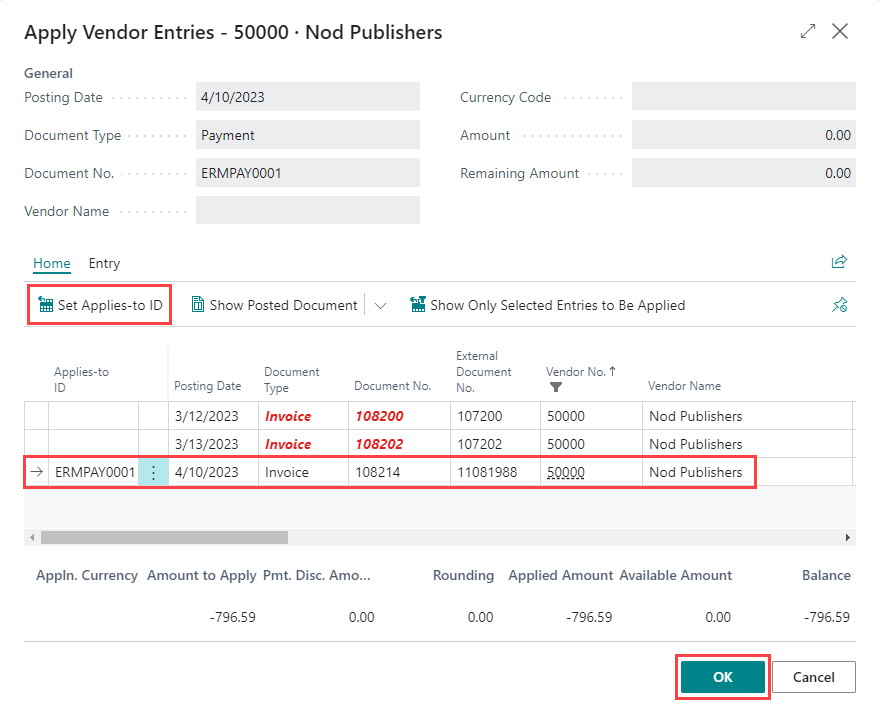
Note: Remote Payment Services payments must be applied to one or more invoices for the payment to go through.
- Apply an invoice to a payment by highlighting it and selecting Set Applies-to ID. This applies the payment number—ERMPAY0001—to that specific invoice—11081988. Click OK to return to the payment journal and review the updated fields:
- Amount
- Applies-to Doc Due Date
Note: You can manually enter invoice information instead of using the Apply Entries feature. Always double-check your work when manually entering payment information.
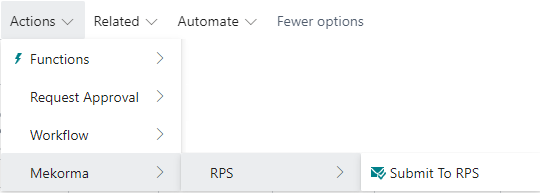
- To submit the payment, open the Actions menu by selecting More options. In the Actions menu, click Mekorma > RPS > Submit to RPS.
![]()
- After a successful submission, you will be prompted with a Processed message. Notice that the RPS Status and RPS Status Description have both updated to Processing and Successful, respectively. If not, refer to Handling Errors with Mekorma Remote Payment Services.
- Your remote payment service provider will process the payment batch. There is a time delay for processing, which can take up to a couple minutes. To check for an update to the batch status, you must refresh the page, using one of the following methods:
- Exit the page and re-open the batch from Payment Journals. The refresh action will run automatically.
- Within Payment Journals, click Actions > Mekorma > RPS > Refresh.
- Once you have refreshed the batch status and the status has updated to Processed, you will be able to post the batch in Dynamics 365 Business Central by clicking Post from the header menu. Once the batch is posted, a new, blank batch is automatically created.
Need more help with this?
We value your input. Let us know which features you want to see in our products.