The following describes how to pay a vendor by check:
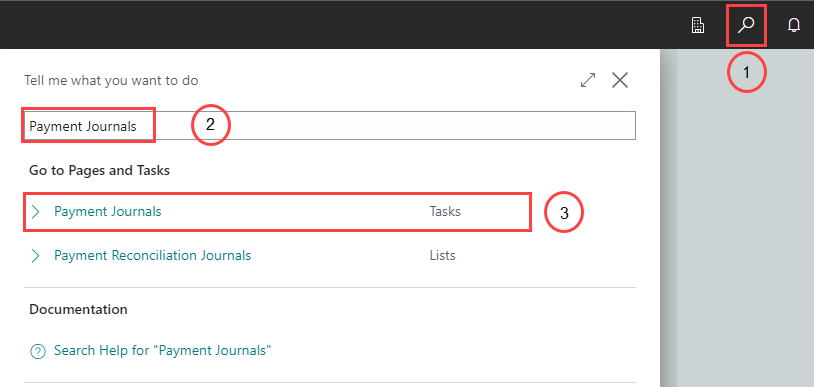
- Choose the Magnifier that opens the Tell Me feature icon, enter Payment Journals, and then choose the related link.
- Fill in the payment journal lines. For more information, see Apply Payments to Related Documents and Post Them – Dynamics 365 Business Central | Microsoft Docs.
- In the Account Type field, select Vendor.
- In the Account Number field, choose a vendor account number for the vendor you would like to pay by check.
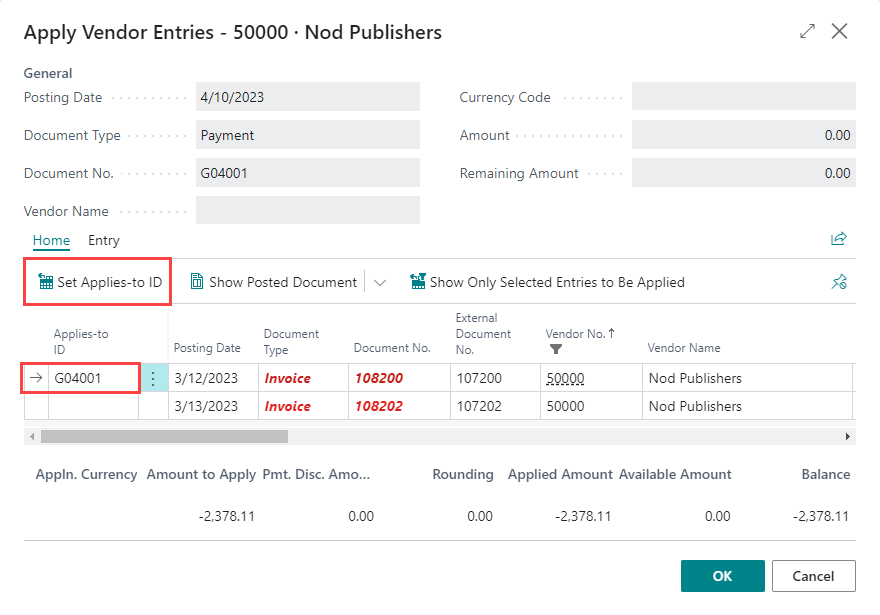
- Click on Home from the page menu and select Apply Entries to select the invoices you would like to apply. In the Apply Vendor Entries screen, select Set Applies-to ID to apply the payment.
This action will calculate the payment total based on the selected vouchers. Click on OK when done.
- In the Remit-to Code field, select the specific remit-to address to print on the check. If none is selected, Dynamics 365 Business Central defaults to the standard vendor address.
Last modified:
March 7, 2024
Need more help with this?
We value your input. Let us know which features you want to see in our products.


