
Next, you’ll import all signature files you want on your checks and link them to the correct users.
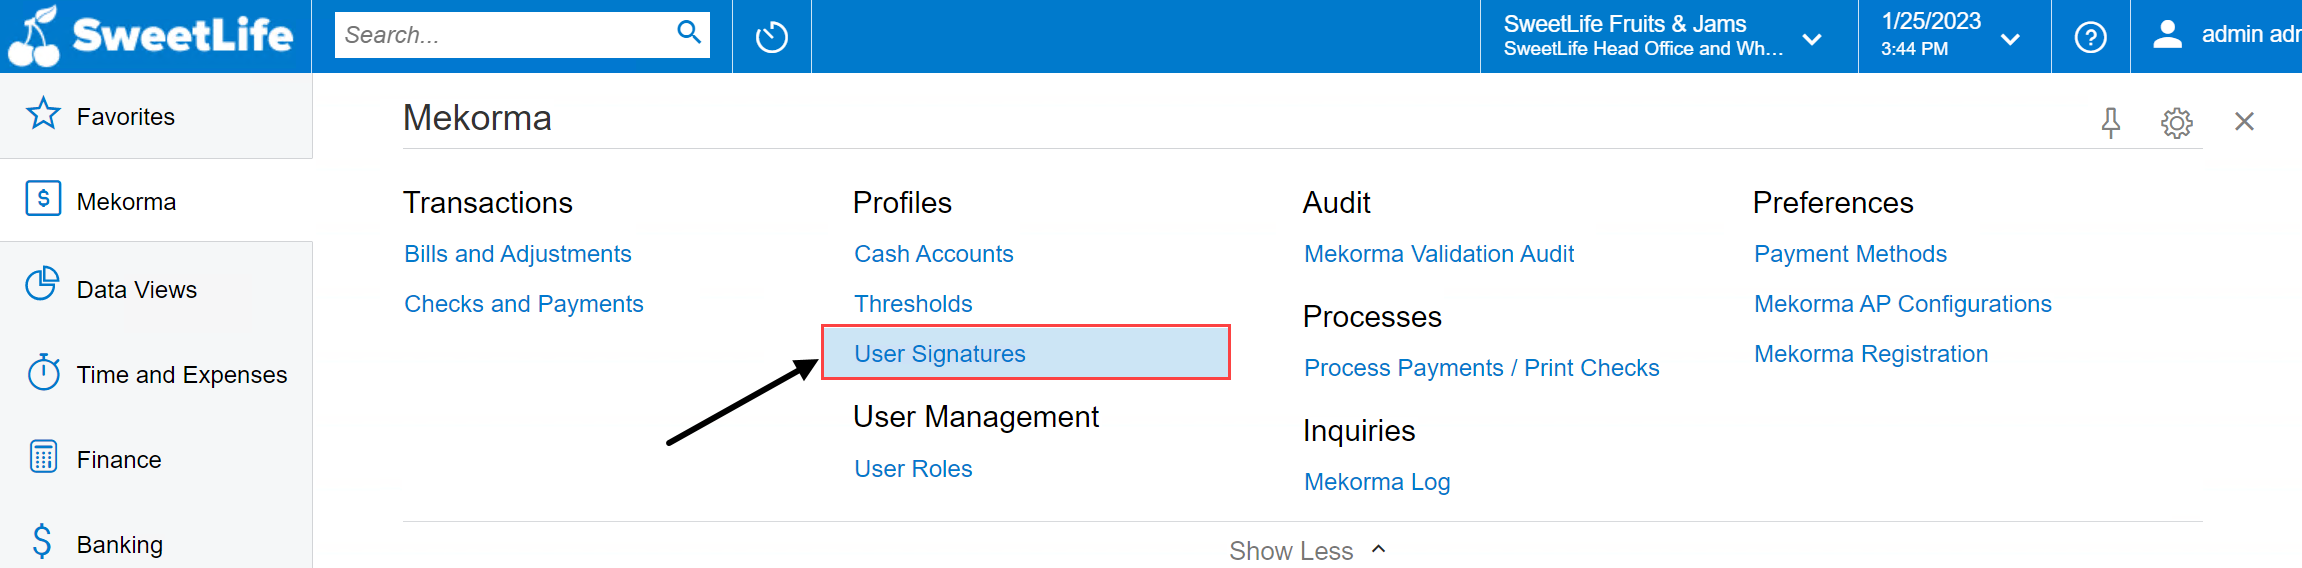
- In the main Mekorma menu, navigate to User Signatures.
![]()
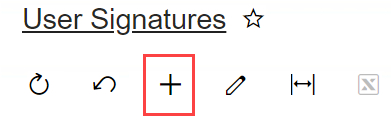
- Click + to add a new signature.
![]()
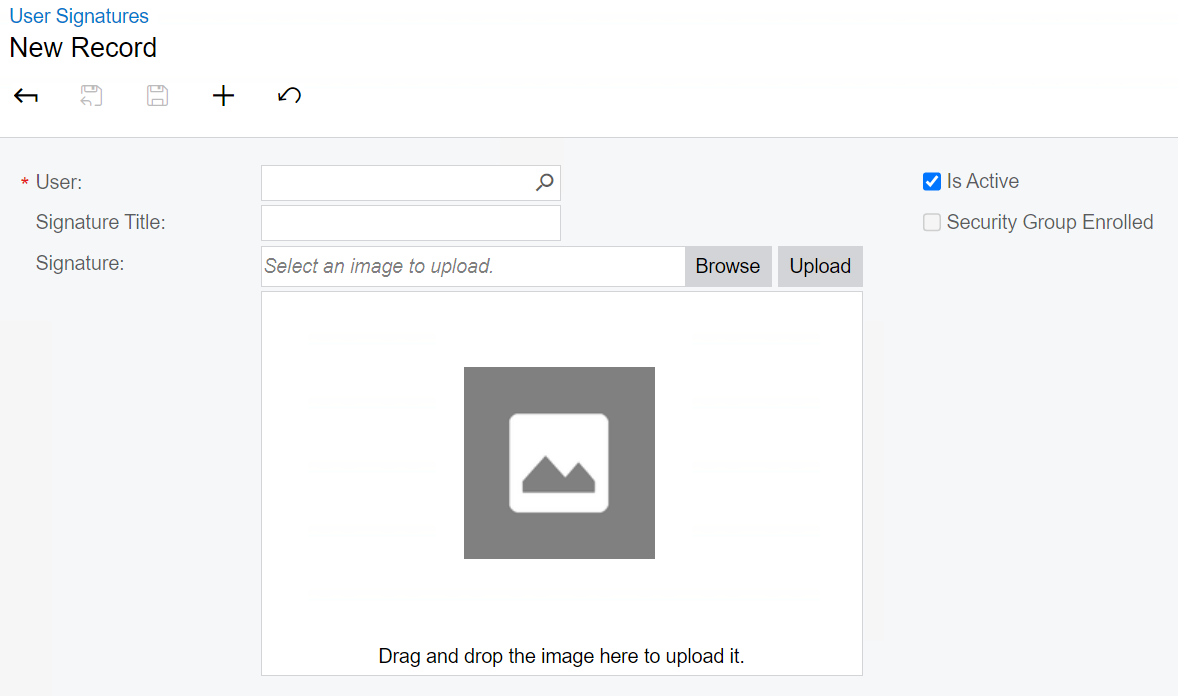
- The New Record window opens.
- Check the box labeled Is Active to use the signature. If left unchecked, the signature cannot be used on a check
- Security Group Enrolled is noneditable and shows if the user is enrolled in an authorized security role, as configured in step 2 of Configuring Electronic Signatures
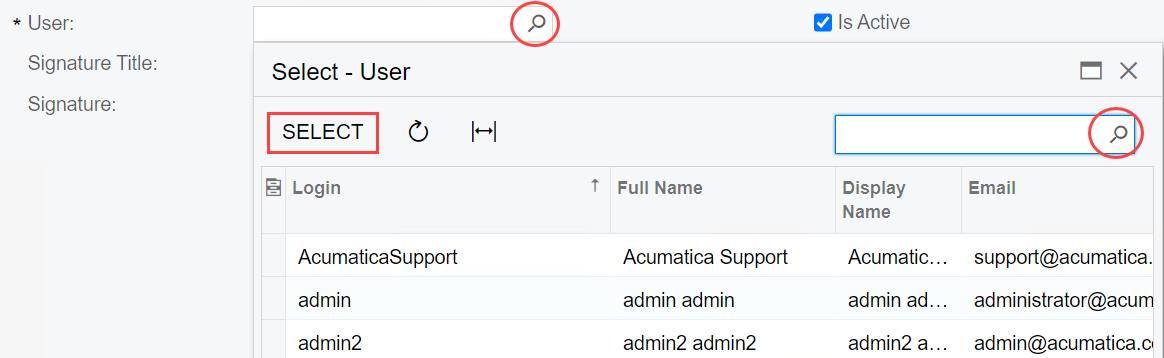
- Click the search icon next to User to find and add the user you want associated with the signature file. Use the search field within this window to search for a user, or browse manually. Once the user is selected, click Select.
![]()
- Manually enter the Signature Title you want printed on the check (e.g., Finance Manager, CEO, etc.).
![]()

- Click Browse to select the signature file you previously created, or drag and drop the file into the upload area.
![]()
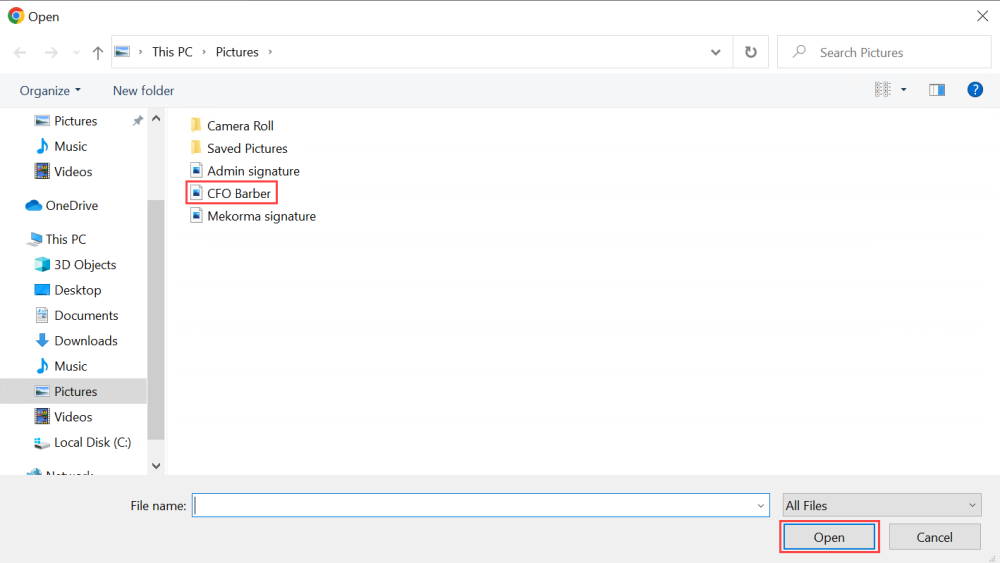
- Click Open to select the file.
- Upload the selected file into Acumatica.
![]()

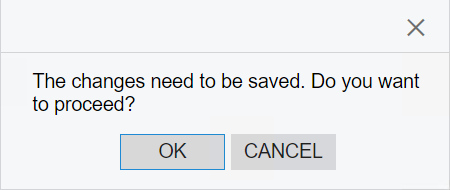
- You will be prompted to save your changes to proceed. Click OK to continue.
![]()
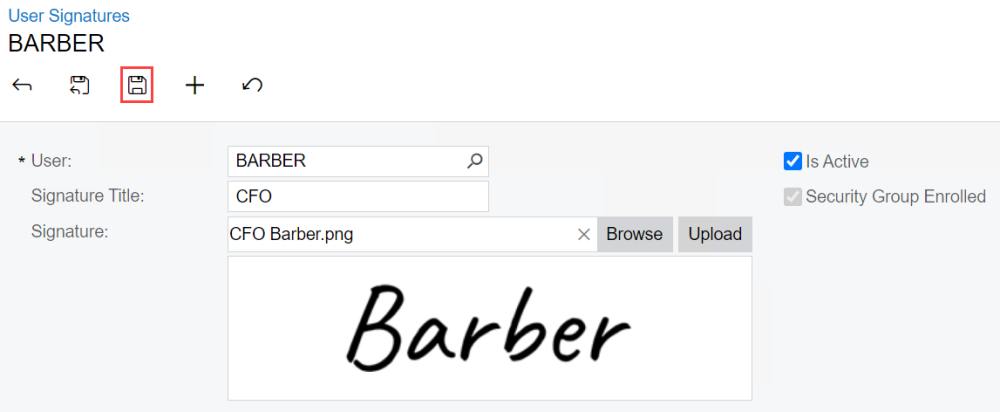
- The signature is now uploaded and displays in the signature box. Click the Save button to save the user signature.
![]()
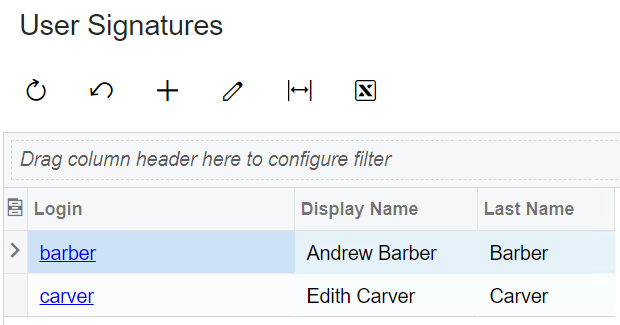
- Using the back arrow, return to the main User Signatures page and the newly uploaded signature now appears in the list of signatures. Repeat steps 2-10 to add additional signatures.
![]()
Last modified:
June 13, 2023
Need more help with this?
We value your input. Let us know which features you want to see in our products.