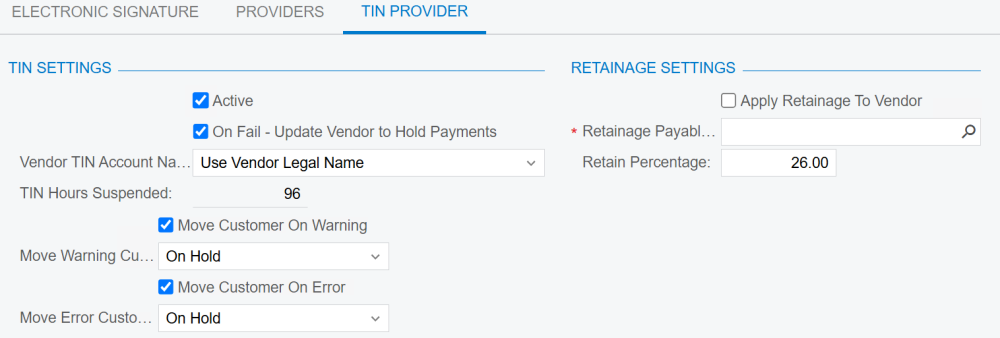
In the TIN Provider tab, you can adjust your TIN and retainage settings. These settings only apply to US-based vendors and customers, as TIN Match only validates those located in the United States.
- To enable Vendor Validation’s TIN Match, ensure that the Active checkbox is selected. If it is unchecked, no TIN Matches or updates will be performed. To turn off TIN Match for individual vendors, review how to exclude vendors from validations.
- With vendor TIN Matching, Error can only be set to Hold Payments or do nothing. Configure this by clicking the check box next to On Fail – Update Vendor to Hold Payment.
- Select which Vendor TIN Account Name you want to use for the TIN Match. Acumatica has more than one location for a vendor’s name, so we allow you to configure which one to use with the IRS.
- Use Vendor Legal Name: This is the official, registered name of the vendor as it appears on legal forms. This is available starting only with Acumatica 2024 R2.
- Use Vendor Account Name: This is the name you use internally to identify the vendor. It may differ from the legal name if the vendor operates under a different ‘doing business as’ name or if you use an abbreviation.
- Use Remit To Account Name: This is the name associated with the vendor’s account for payments. It’s what you would see on their invoices or payment instructions.
- Use Ship From Account Name: This is the name associated with the vendor’s shipping operations. It helps distinguish where goods are being sent from, especially if there are multiple shipping locations.

- TIN Hours Suspended is a non-editable field. If you submit the same TIN name with three different numbers, the IRS will view this as a phishing attempt and suspend your account for 96 hours.
- Use the Move Customer options to toggle on/off to move a customer’s status when a warning or error result is returned from the validation. This establishes that when a validation result is returned, Vendor Validation is able to alter a customer’s status in the customer card.
- Use the Move Warning and Move Error options for customers to dictate what happens to payments when a warning or error is the result of a validation.
- Check the box next to Apply Retainage To Vendor to apply retainage. This is required by the IRS for vendors who do not have a matched TIN record or any vendor who fails the TIN Match and is a 1099 vendor.
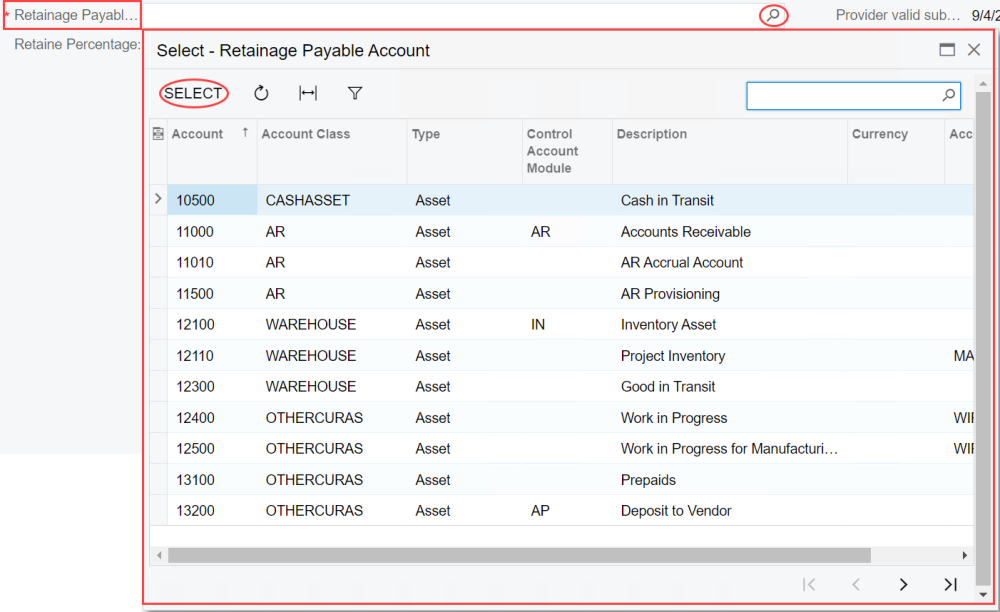
- Click the search icon to the right of the Retainage Payable Account field and select the specific account to apply retainage to. Once you have selected an account to apply retainage to, choose the retainage percentage you would like Mekorma to hold back (the default is 26%).

Once you are satisfied with how your TIN Provider is configured, you are ready to start validating against IRS records through Mekorma. These fields can always be updated by following the steps on this page.
Last modified:
December 12, 2024
Need more help with this?
We value your input. Let us know which features you want to see in our products.


