
- Open the Action Board (Mekorma Area page > Transactions > Payables > Mekorma Action Board).
- Choose Process Checks and EFTs from the Action drop-down menu.
![]()
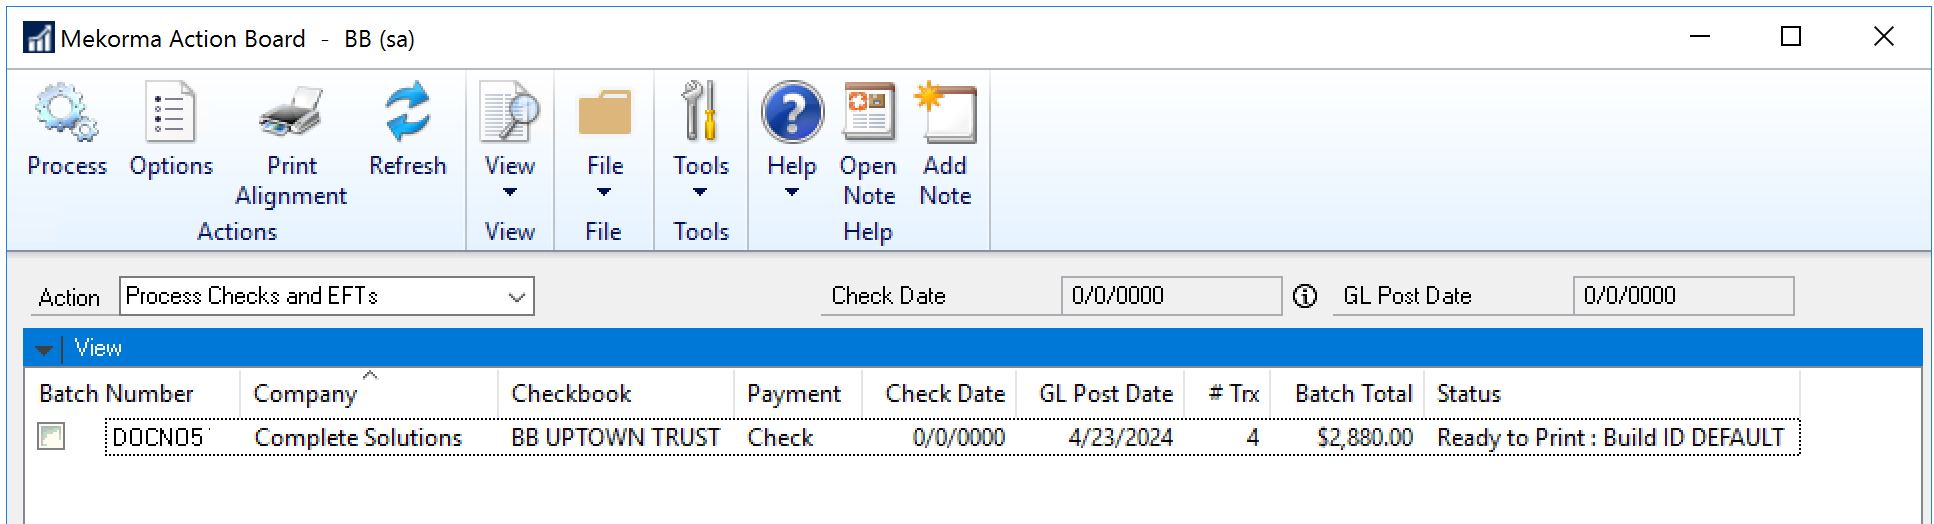
- Select one or more fully approved batches and click Process. You can process batches that contain payments for vendors enrolled in payment outsourcing, in addition to those not included in the service. In the example above, batch DOCNO5 contains 3 transactions for enrolled vendors, and 1 transaction for an Excluded vendor.
- The Action Board will then generate payment files (1 per batch) and send them to the outsource provider, and those payments designated as local processing will print on your printer.
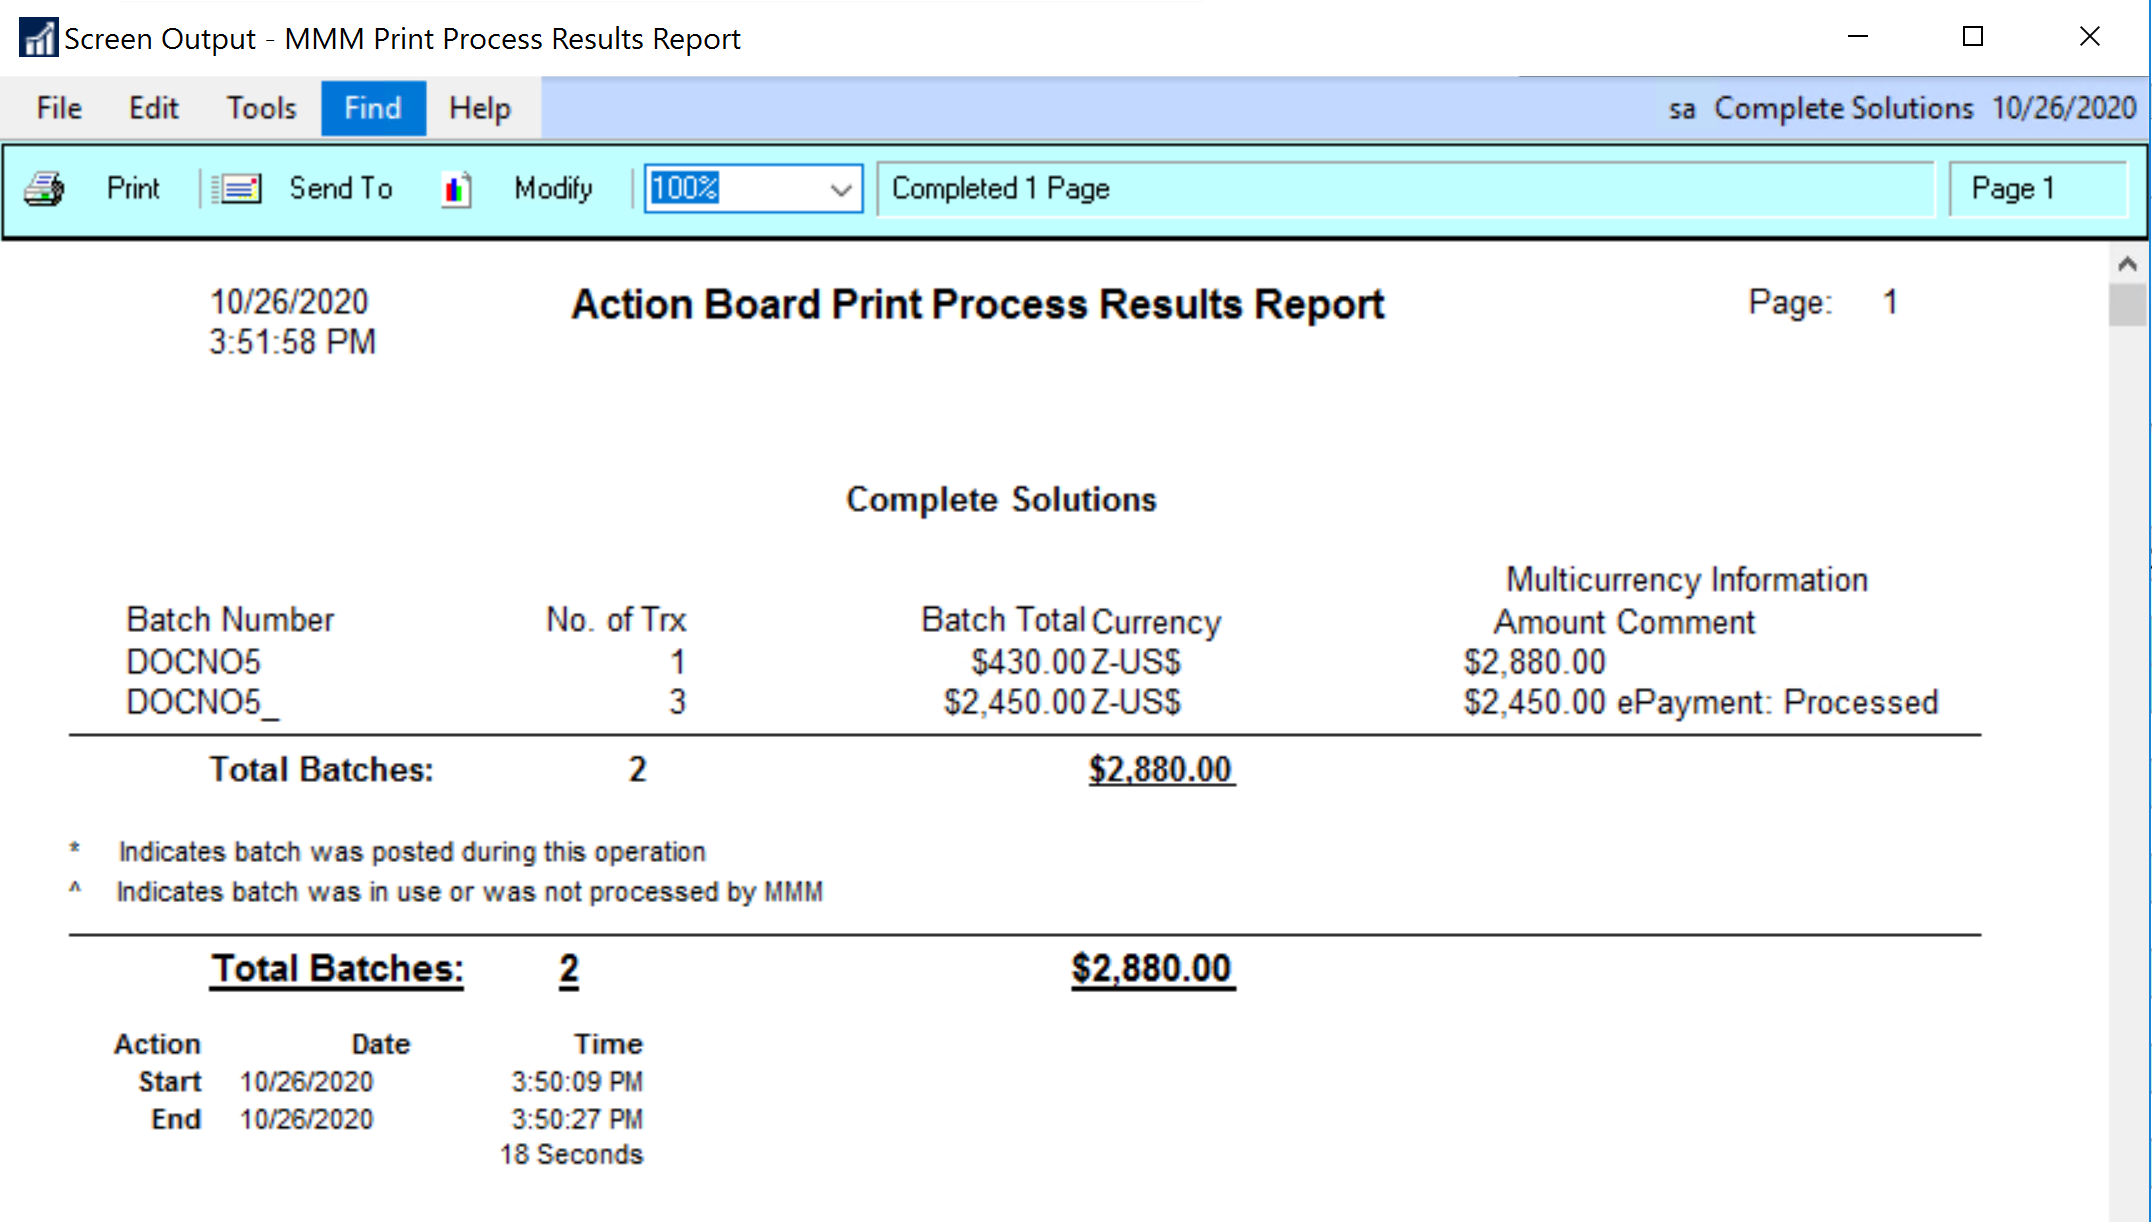
- When all selected batches have finished processing – ie., outsourced payment files sent to the provider platform and local payments printed – the Results Report will be available:
![]()
As you can see, payments will be split into two separate batches: all locally processed payments remain in the original batch; outsourced payments will move to a new batch that retains the original name of the batch with an added underscore. In our example, DOCNO05_ is labeled ePayment: Processed. If a batch only contains payments for enrolled vendors, the batch will not be split and the remote payments will remain in the original batch.
- The Remote Payment Services Batch Status window will also open to indicate the results as the outsource portal communicates with Dynamics GP. When batches have completed processing on the provider portal, the window response will update:
![]()
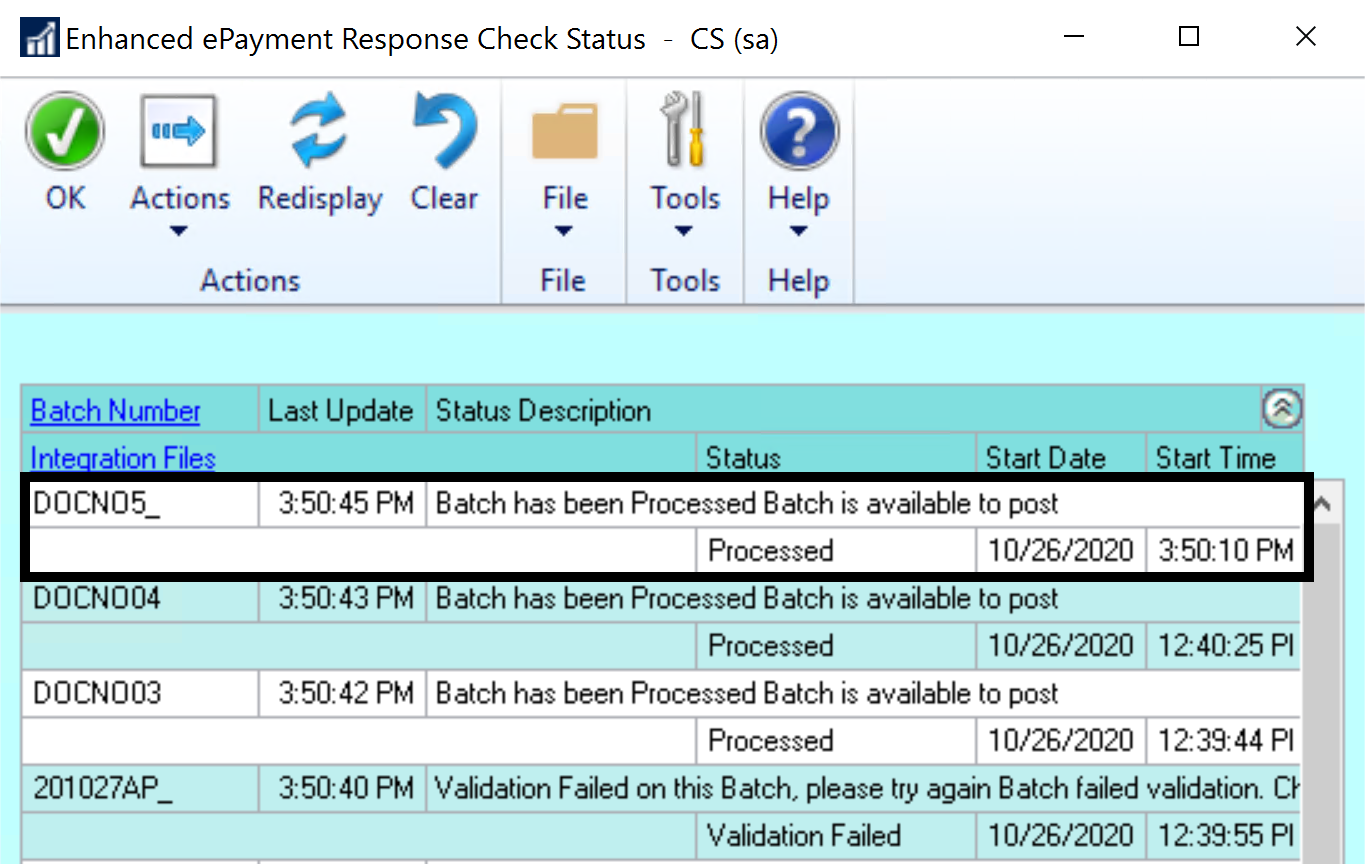
- If the Remote Payment Services batch contains individually funded payments, it is released for posting. The batch status description updates to Batch is available to post, and the status displays as Processed.
- If the Remote Payment Services batch contains bulk funded payments (only available if processing with Corpay), the batches will be split and processed in this way:
- If you are running GP2015, payments are moved to a local Payments batch. The Batch ID will be the original Batch ID with a ‘_V’ suffix.
- If you’re running GP2016+, payments are moved to a new Credit Card batch – the associated credit card can be viewed in the Remote Payment Services configuration window.
- This Batch ID will be the original batch name with a ‘_V’ suffix.
- In addition, a new payment is added to the original batch to pay the outsource provider.
- Batch_V is then released for further processing, and the batch status description updates to Batch is available to post, and the status displays as Processed.
- After processing completes, the payment provider will analyze the batches and get them ready to pay after the daily cutoff time. That process can be seen similarly to the process of printing checks in the sense that you want to be sure that it completed successfully before posting. The Action Board blocks posting until this verification process is complete. That gives you a chance to intervene for any errors occurred during that validation process before you post. Wait a few minutes and then use the “Update Remote Payment Services Status” action. The Action Board will go to each company that processed batches to confirm that the validation completed successfully before you post.
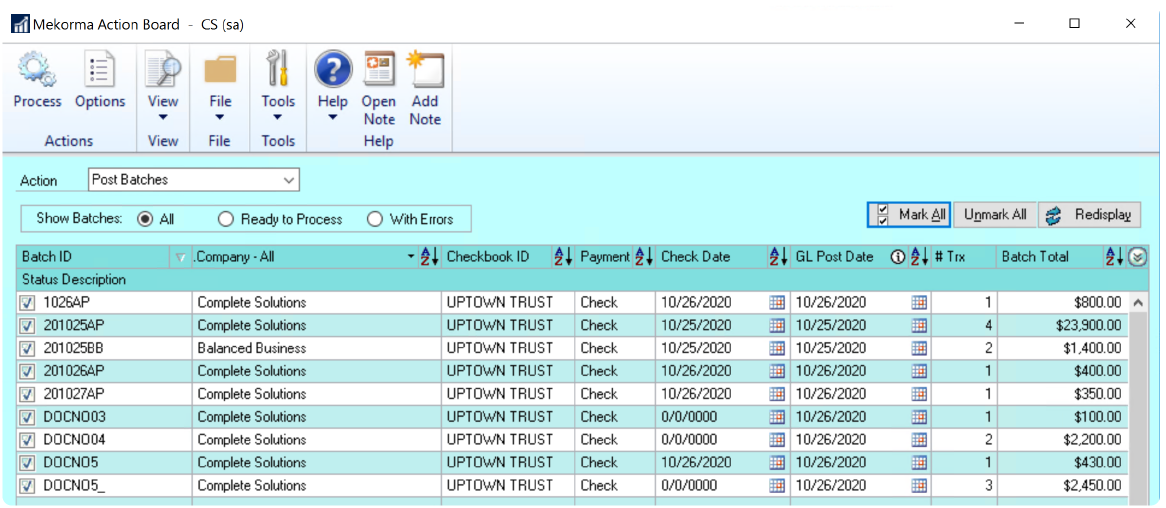
- Both Remote Payment Services and locally processed batches can then be posted simultaneously by choosing the Post Batches option on the Action Board.
![]()
Last modified:
August 23, 2022
Need more help with this?
We value your input. Let us know which features you want to see in our products.