
The first step in configuring Named Printers is to name them! Printers must be set up with Printer IDs:
- Login as an adminstrator.
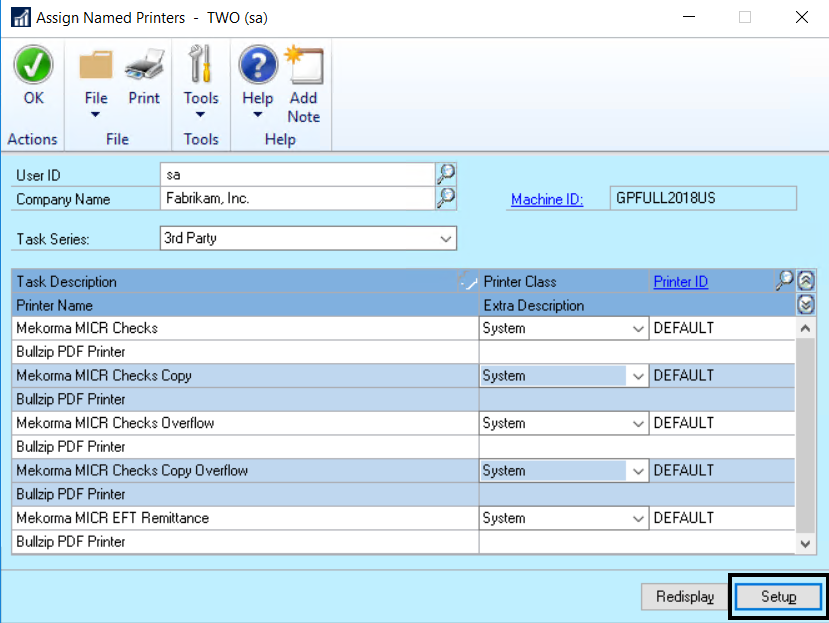
- Navigate to the Assign Named Printers window.
- Confirm that a Machine ID is entered, and that a default printer has been assigned in Dynamics GP.
- Click on Setup to open the ‘Setup Named Printers’ window.
- Create a new Printer ID by typing the desired name in the Printer ID field.
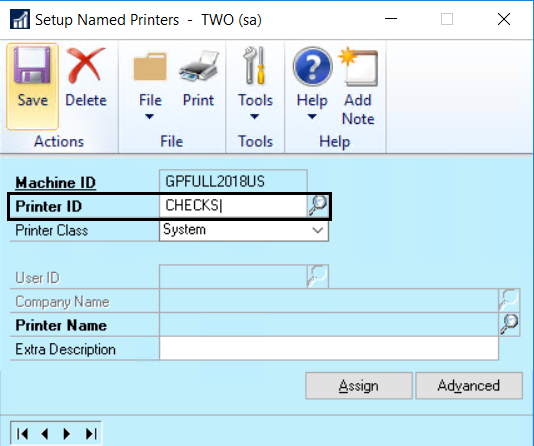
- Choose the Printer Class from the drop-down menu options:
- System: Applies the same designated printer across companies and for every GP user.
- User: Allows each individual user to be assigned a unique printer, applied to every company the user prints from.
- Company: Gives the option to assign a printer on a per-company basis, no matter which user is printing in that company.
- User & Company: Ties printers to individual users on a per-company basis.

- Fill in the rest of the fields as required by the Printer Class; a Printer Name must be selected by using the lookup.
- Click Save.
- Proceed to assign printers to Mekorma Tasks…
Last modified:
August 6, 2020
Need more help with this?
We value your input. Let us know which features you want to see in our products.