
After the outsource provider has set up the first checkbook to be used for outsourced payments, additional checkbooks can be added (for a fee).
Step 1: Checkbook is configured in the ePayment Portal
If you would like to add an additional checkbook for ePayment processing, you will need to contact your provider (AvidXchange or Nvoicepay) and fill out the necessary paperwork. The provider will then configure the checkbook within their payment portal.
Step 2: Add the Checkbook in the Enhanced ePayment Configuration window
The new checkbook must then be added in Dynamics GP by the user.
- Log in to Dynamics GP and open the Enhanced ePayment Configuration window.
- Click on the next available line in the checkbook fields at the bottom of the window. Use the look-up to choose the Checkbook ID of the checkbook you want to add. This will pull in the GP account description and bank account number.
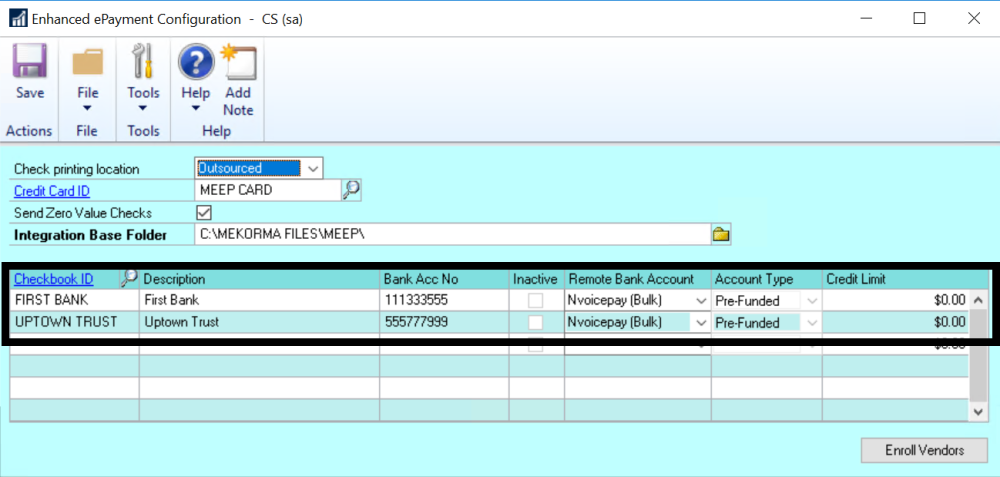
- Match the GP checkbook with the correct provider by using the drop-down menu under the Remote Bank Account column.
- For AvidXchange customers, there will only be one choice (AvidXchange)
- For Nvoicepay customers, you must choose between Nvoicepay and Nvoicepay – Bulk. This refers to how you want payments handled in Dynamics GP. Please see here for more information.
- Click Save to close the window, and from that point on the checkbook can be used to pay vendors remotely.
Need more help with this?
We value your input. Let us know which features you want to see in our products.