
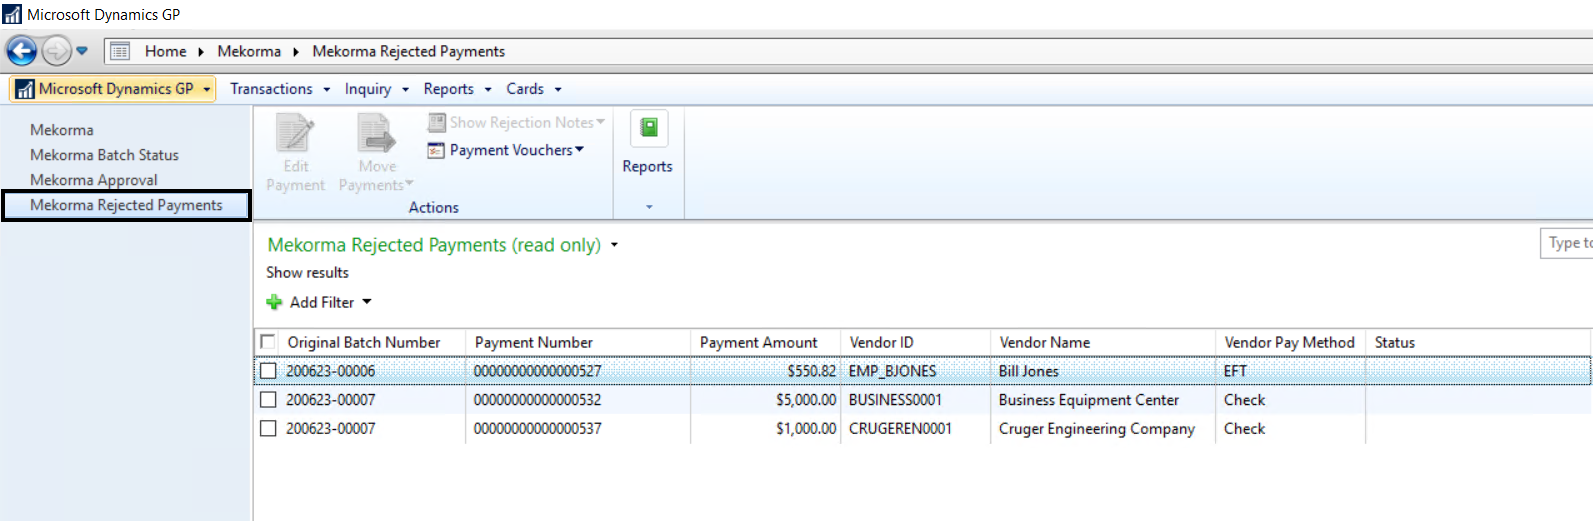
The navigation list allows you to see all the payments that were rejected during the approval process (and subsequently placed in the MICR_REJECT batch). The Mekorma Rejected Payments navigation list allows authorized users to work with rejected payments in the following ways:
- Review all rejected payments: drill into payment details and reasons for rejection.
- Drill into an individual payment by choosing the Edit Payment option: delete it entirely from the MICR_REJECT batch, sending the payment vouchers back to Open status.
- Move individual rejected payments into a new batch by choosing the Move Payment option.
![]()
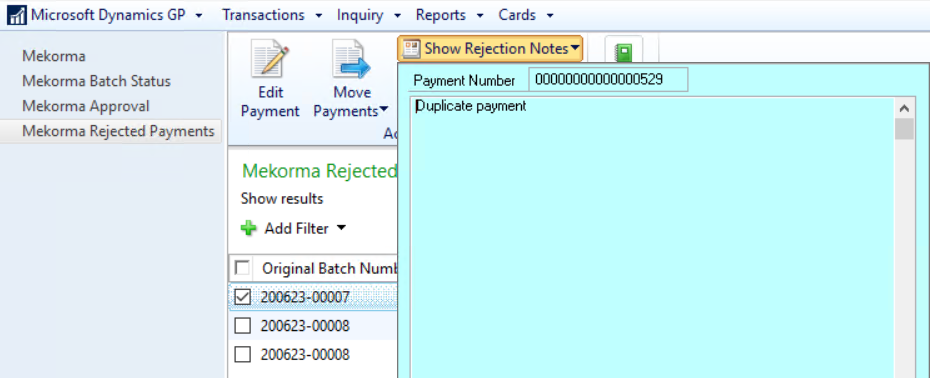
Review Rejected Payments
To view the reason a payment was rejected:
- On the navigation list, check the box next to a payment.
- Click on Show Rejection Notes.
![]()
To view payment / voucher details:
- On the navigation list, check the box next to a payment.
- Click on Payment Vouchers. A window will open to display all listed payments (top section). By clicking on a payment, vouchers included in that payment will display in the lower section.
- Double-click on a voucher to open the Payables Transaction Entry Zoom window for more details.
![]()

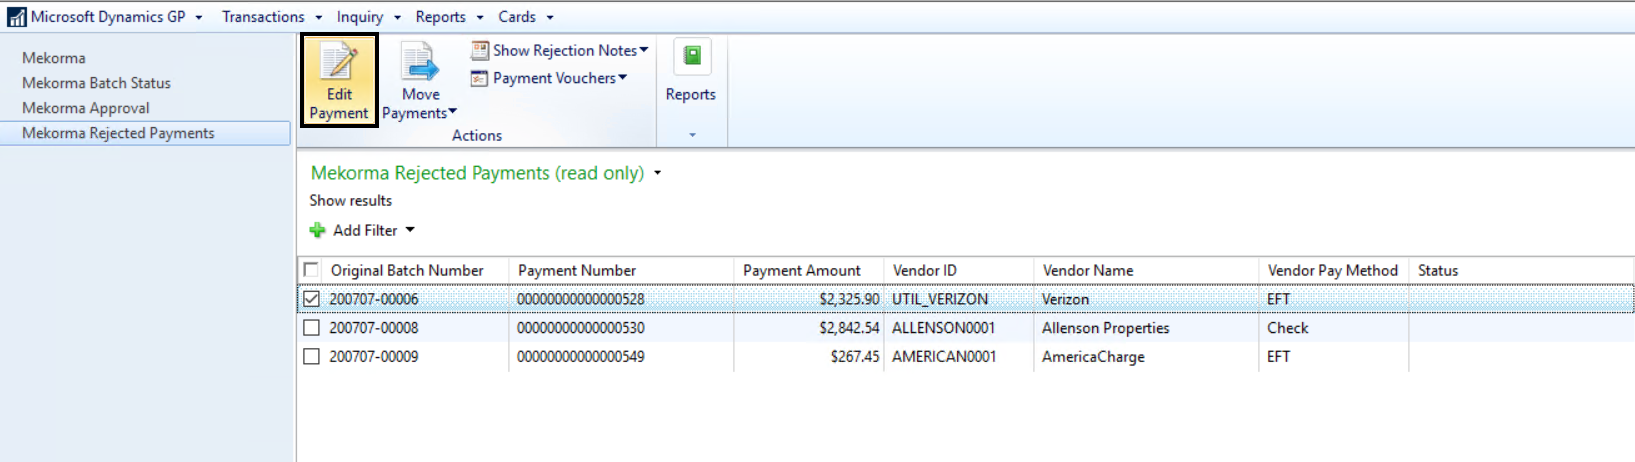
Edit Payments
You can open the GP Edit Payments window to view the rejected payment. You have the option to delete the payment from the MICR_REJECT batch.
- Select a payment and click Edit Payment. The Edit Payment window will open.
![]()
- Click Delete to remove the payment from the MICR_REJECT batch and all vouchers will be returned to Open status.
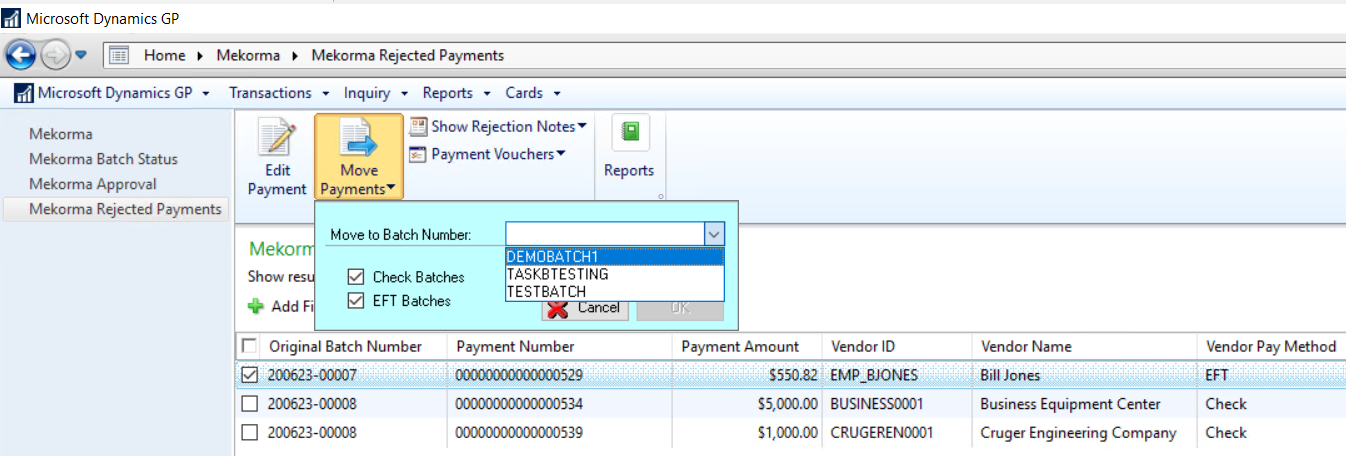
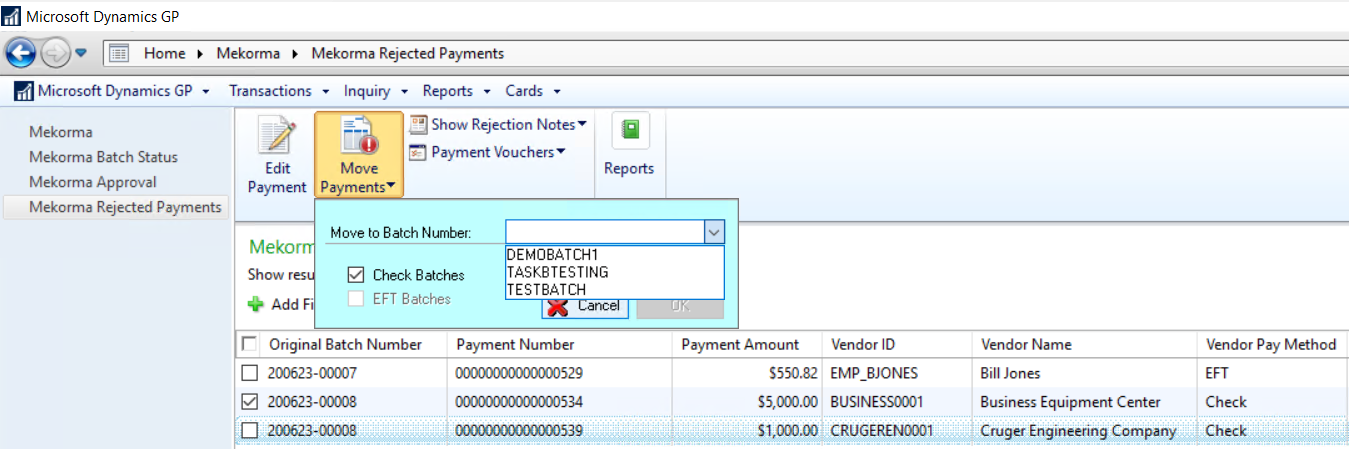
Move Payments
From the Rejection navigation list, you can select one or more payments and move them out of the MICR reject batch to existing payment batches for further processing.
Depending on the original payment method of each payment, you can move them to an EFT and/or a check batch.
- Payments that were EFTs in the original (but rejected) batch can be moved to either a check or an EFT batch. You will see a blue arrow icon on the Move Payments button to indicate the payments being moved are all EFTs; both check and EFT batches will be available on the batch drop-down menu.
![]()
- Checks can only be moved to a check batch, because the associated vendors may not be set up in GP for EFT processing. If you choose check payments from the list, or a combination of check and EFT payments, you will see a red information warning on the Move Payments button. The batch drop-down will only display available check batches.
![]()
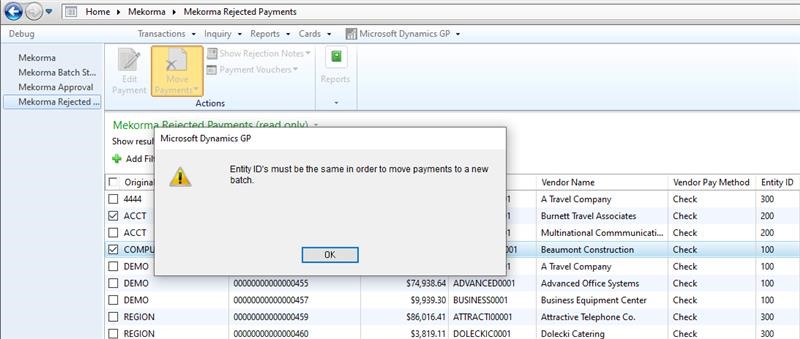
- When a MEM payment has been rejected, those payments can only be moved to a batch associated with the same entity. If the selected Payments have different Entity IDs, you will see an “X” icon on the Move Payments button, and an error message will display.
![]()
Need more help with this?
We value your input. Let us know which features you want to see in our products.