
Configuring threshold IDs for signatures gives you the ability to automatically print signatures using dollar-value ranges and to print blank lines for handwritten signatures.
Configure One or Two Signatures for all Dollar-Value Amounts
- Make sure all necessary signatures have been assigned to the appropriate user IDs.
- Open the Threshold Maintenance window (Mekorma Area page > Setup > System > Threshold Maintenance).
- Create a new threshold ID.
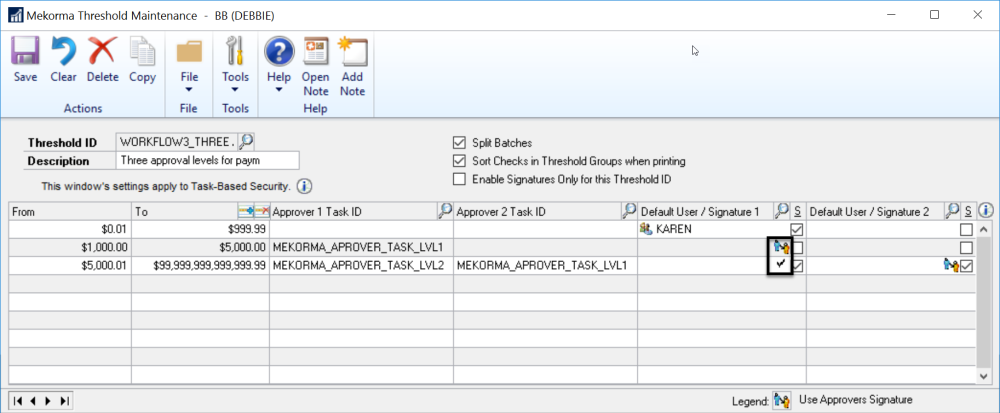
- To override a default signature with an approver signature at the individual threshold level, click on the icon next to the Signature Line check box.
![]() Checkmark: The default signature entered in the field will be printed for the payments in a particular threshold level.
Checkmark: The default signature entered in the field will be printed for the payments in a particular threshold level.
![]() Two people icon: The approver signature will overwrite the default signature selected and will be printed for the payment in a particular threshold level.
Two people icon: The approver signature will overwrite the default signature selected and will be printed for the payment in a particular threshold level.
- To add a default signature, use the look-up button in the Default User/Signature 1 field to open the Mekorma Signatures Files Lookup window.
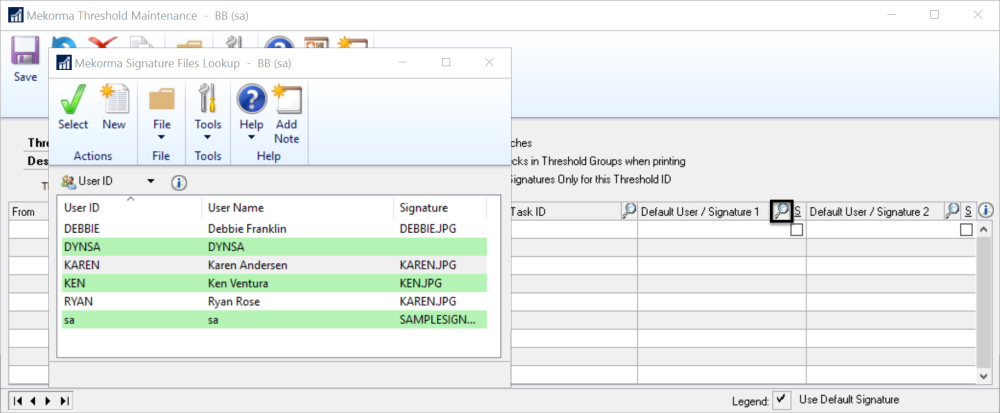
There are two ways to add a signature: Signature assigned to a user ID, or a signature file that has been imported to the signature library but is not associated with a user ID. You may want to do this, for example, if your CEO is a check-signer but is not a Dynamics GP user. In that case, you can Import Signatures directly to the Signature Library and then follow the steps below to select a signature file from the library that is not associated with a user ID.
Signature Assigned to a User ID
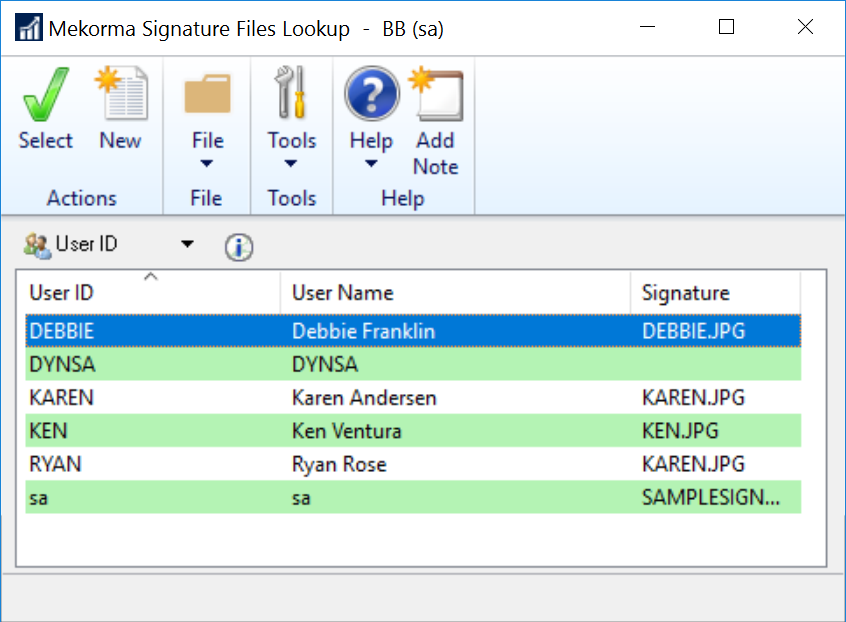
In the User ID view, select a signature assigned to a user ID.
Signature File Only
To change the view to signature files, click the dropdown and select Signatures.
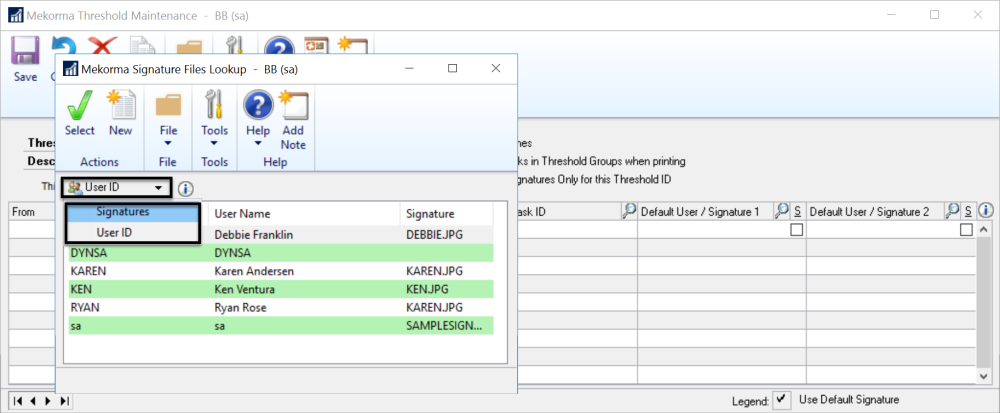
Now you can select a signature file from the signature library that is not associated with a user ID.

- To print two default signatures, use the look-up button in the Default User/Signature 2 field to open the Mekorma Signatures Files Lookup window.

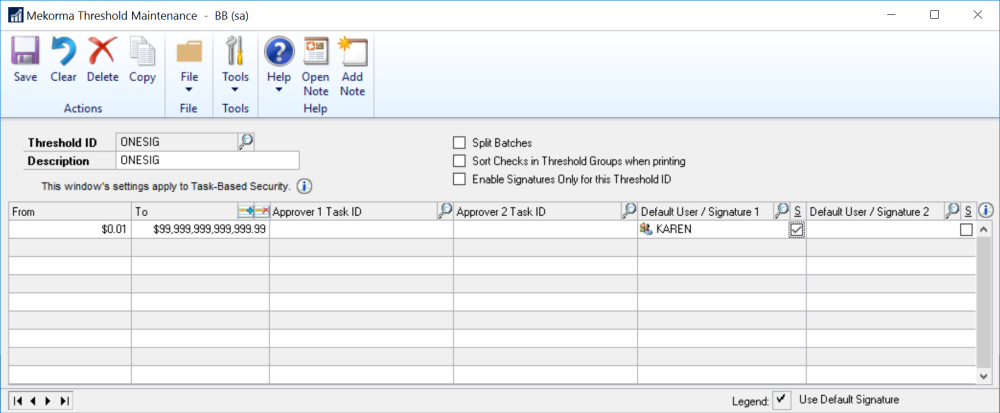
Here the Threshold ID is configured to produce a single signature assigned to all dollar values.
- Assign the Threshold ID to the checkbook to which you would like to apply these signatures.
- Use the Edit Vendor Payment window to make a test batch with a payment of any dollar amount. Print that payment.
Your check will be printed with one or more signatures. Now we’ll enhance that with signature lines and different numbers of signatures based on dollar-value ranges.
Adding Conditional Logic based on Dollar-Value Ranges
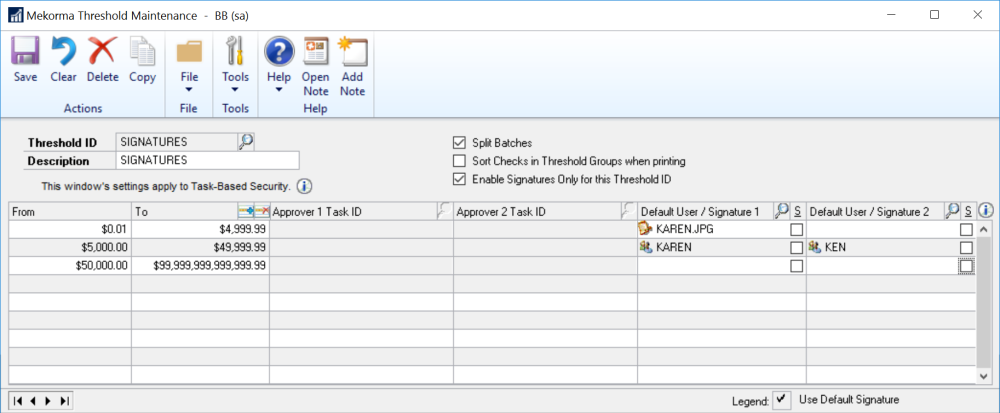
You can print the signatures conditionally based on dollar-value ranges.
In the example below, checks with an amount up to $4999.99 will print with Karen’s signature. Checks with an amount from $5000.00 to $49,999.99 will print with Karen’s and Ken’s signatures. Checks with an amount of $50,000.00 or more will print with no signature—they will need to be manually signed.
Adding Signature Lines
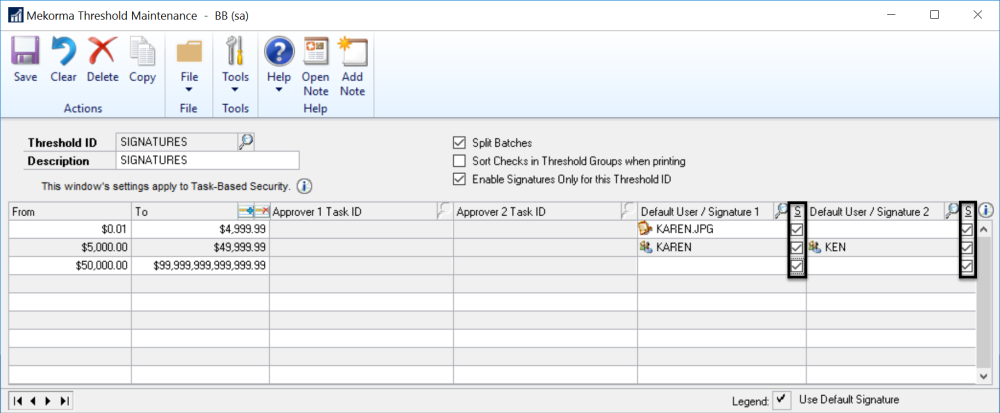
Finally, signature lines can be added simply by checking a checkbox and are also conditional based on dollar value ranges. You can have a line with or without a signature. The following configuration prints one underlined signature for check amounts ranging from $0.01 to $4999.99, one underlined signature along with a blank line to be manually signed for check amounts ranging from $5000.00 to $49,999.99, and two blank lines for check amounts from $50,000.00 and larger.
To test this configuration, create a batch and input 3 payments, for example:
- $500 — will show just Karen’s signature (underlined)
- $5500 — will show Karen’s signature (underlined) and a blank line
- $60000 — will show two blank lines
But first, Apply your Threshold ID to a Checkbook.
Need more help with this?
We value your input. Let us know which features you want to see in our products.