
Power Approvals is a Mekorma product that needs to be imported into the Power Apps cloud. In this section, you will be instructed to download the application package and import it into Power Apps.
Prerequisites for Importing Power Approvals
Download the Power Approvals package from the Mekorma website. Upon clicking Download Power Approvals, a zip file will be downloaded. Do not open it, you will import the file to the cloud in the steps that follow.
If you need an older version, scroll to the bottom of the page and open the Build Archive. Locate the Power Approvals build that you need and download it via the link provided.
Import Steps
- Power Approvals
-
- Open your browser in private mode, go to the Power Apps website, and log in as the service account user.
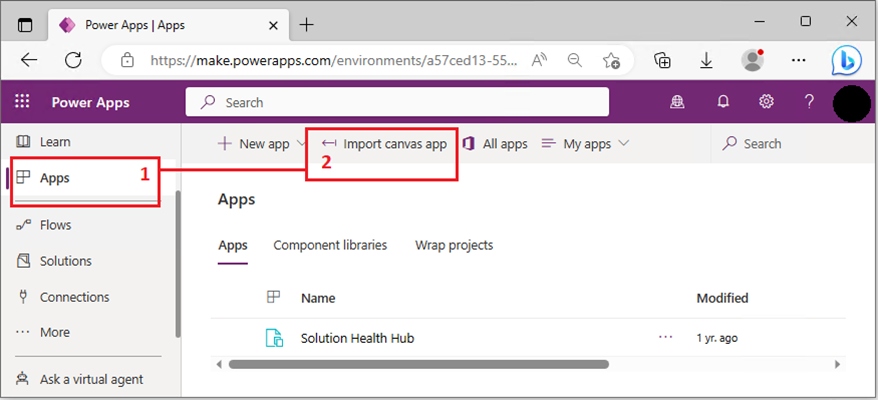
- Click Apps and then Import canvas app.
![]()
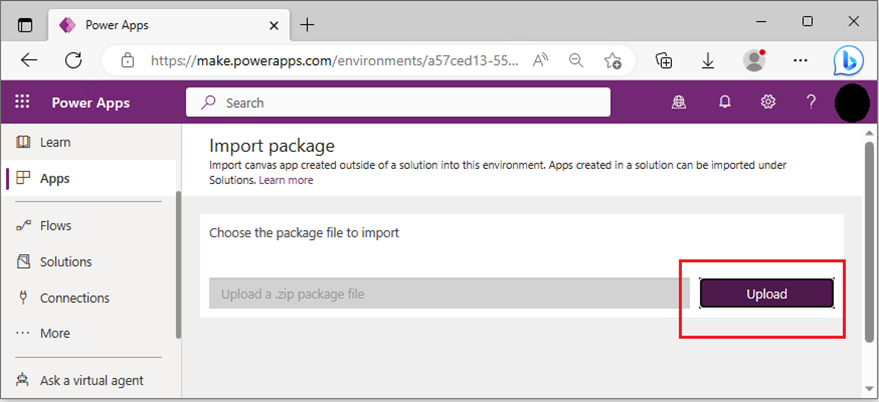
- Click the Upload button to select the Power Approvals zip package you downloaded from the Mekorma website.
![]()
- Select the Power Approvals zip file and click Open.
![]()
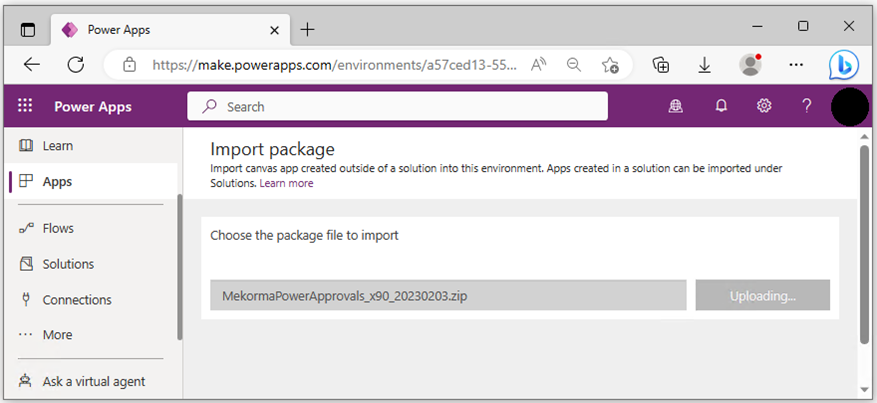
- Uploading the package will take a few minutes, do not navigate away from this page during the process.
![]()
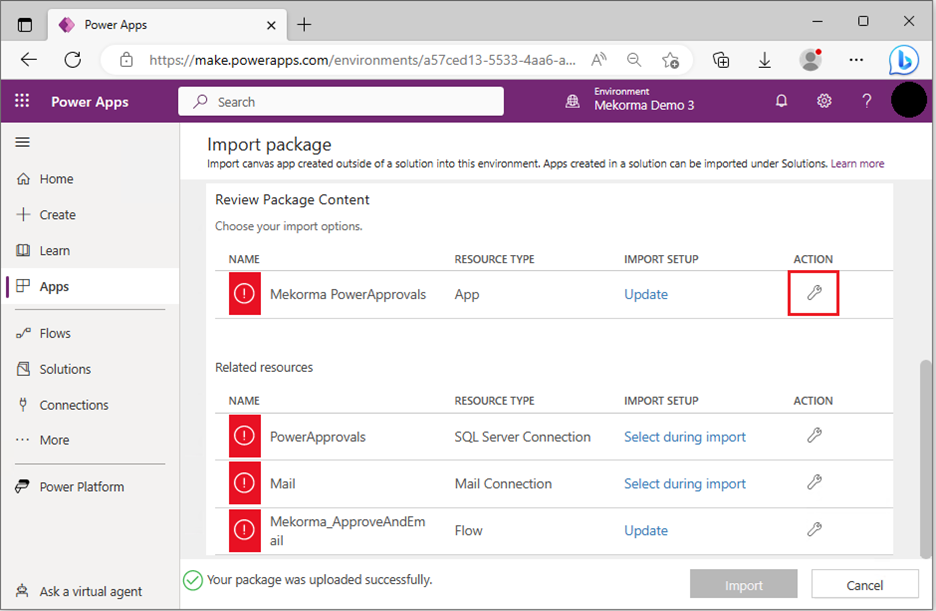
- Once imported, begin setting up the app by clicking the wrench icon for Mekorma Power Approvals app.
![]()
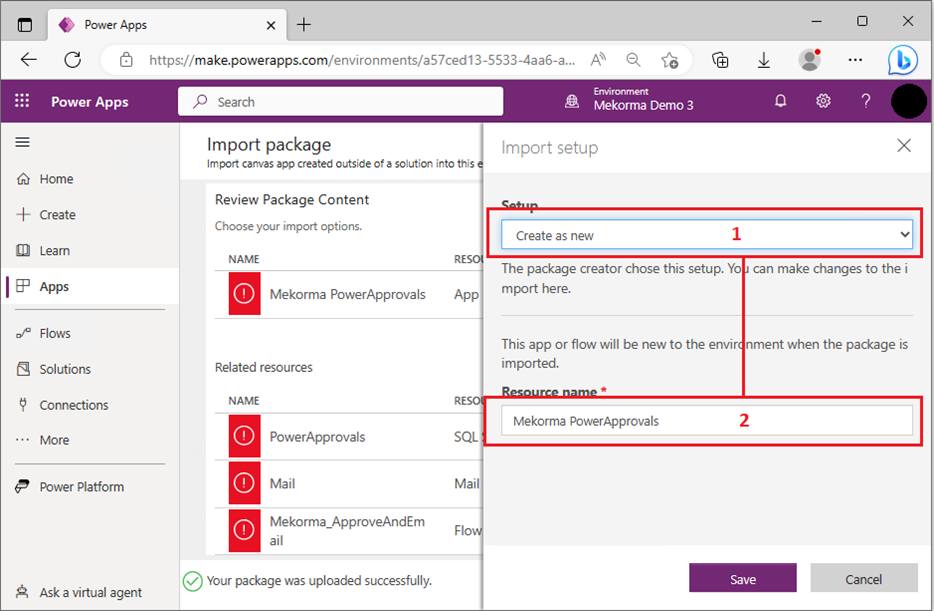
- In the Import setup window, change the Setup drop-down to Create as new. Under Resource name, set to Mekorma Power Approvals.
![]()
- Click Save to finalize the changes.
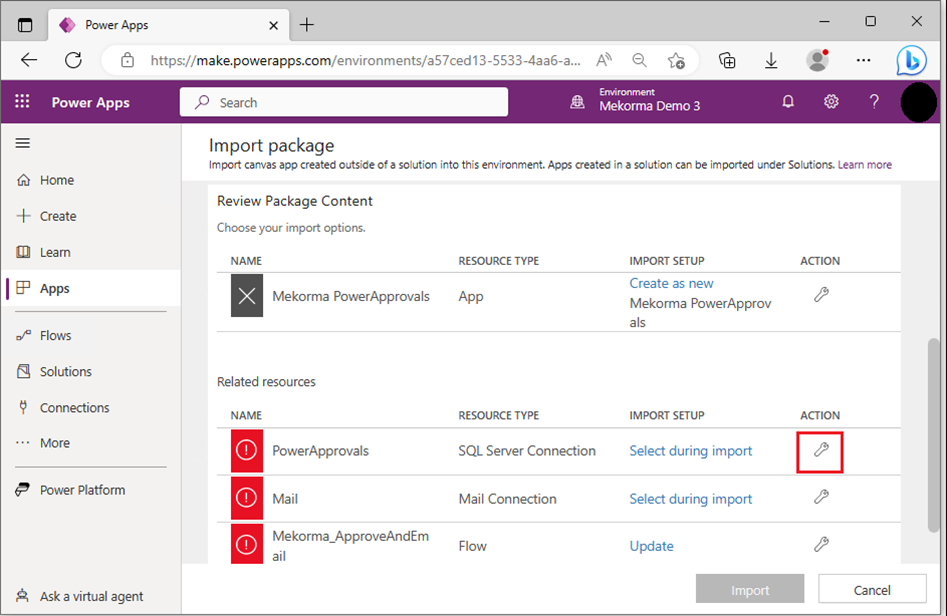
- To set up the SQL Server connection, click the wrench icon for Power Approvals. Note: Pay attention to the Resource Type. Step 6 above focuses on the Mekorma Power Approvals app, here you want to access the Power Approvals SQL Server Connection.
![]()
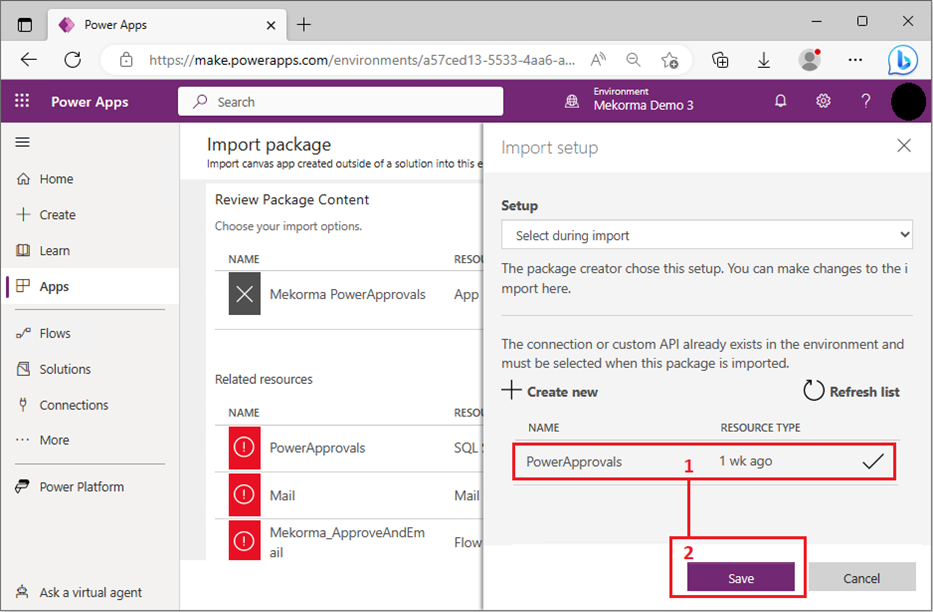
- In the Setup drop-down, set it to Select during import and select the SQL Server connector, in this case Power Approvals. Click Save to finalize the setup.
![]()

- Mail Connector
-
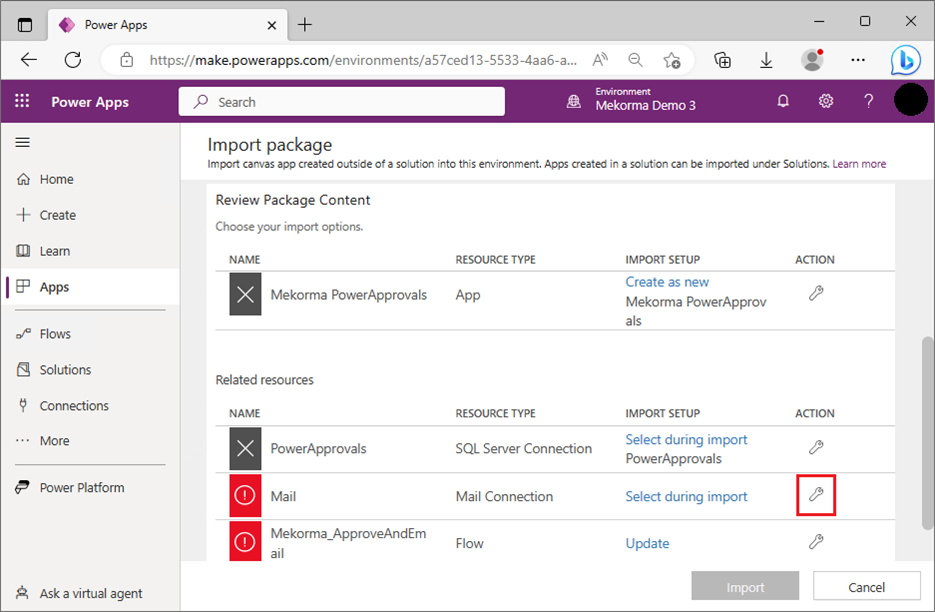
- To set up the mail connection, click the wrench icon for Mail.
![]()
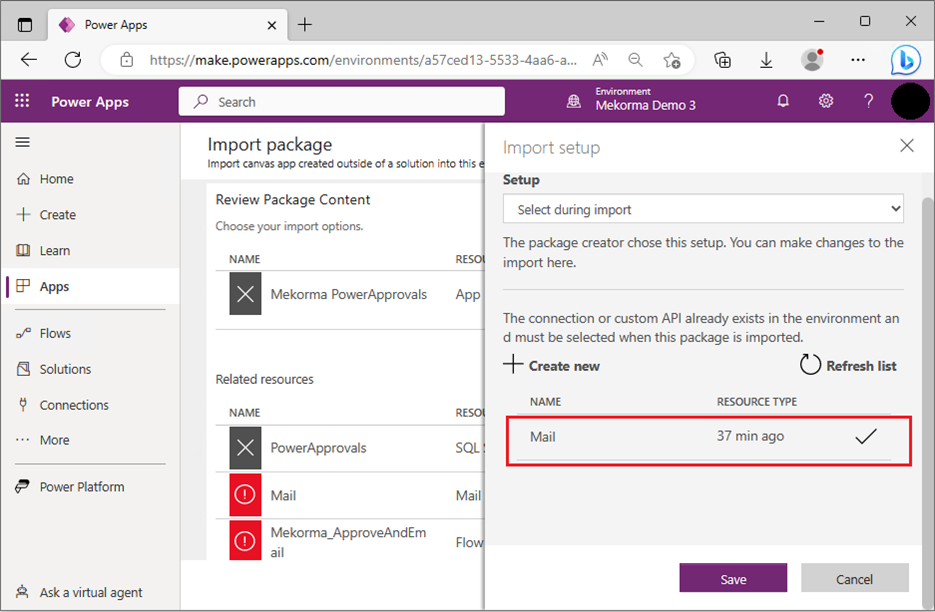
- Set the Setup drop-down as Select during import and select the mail connector. Click Save to finalize the setup.
![]()
- To set up the mail connection, click the wrench icon for Mail.
- Flow
-
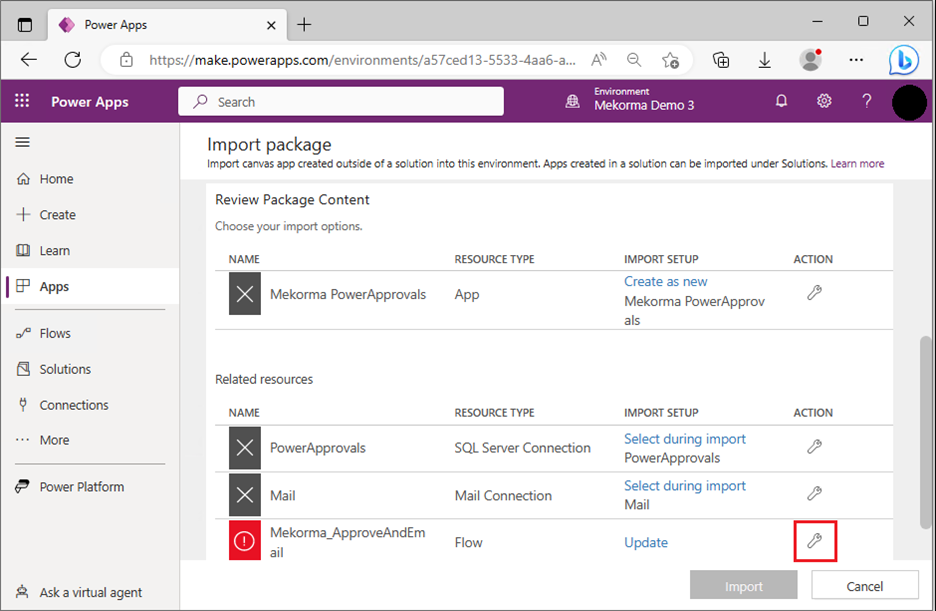
- To set up the flow, click the wrench icon for Mekorma_ApproveAndEmail.
![]()
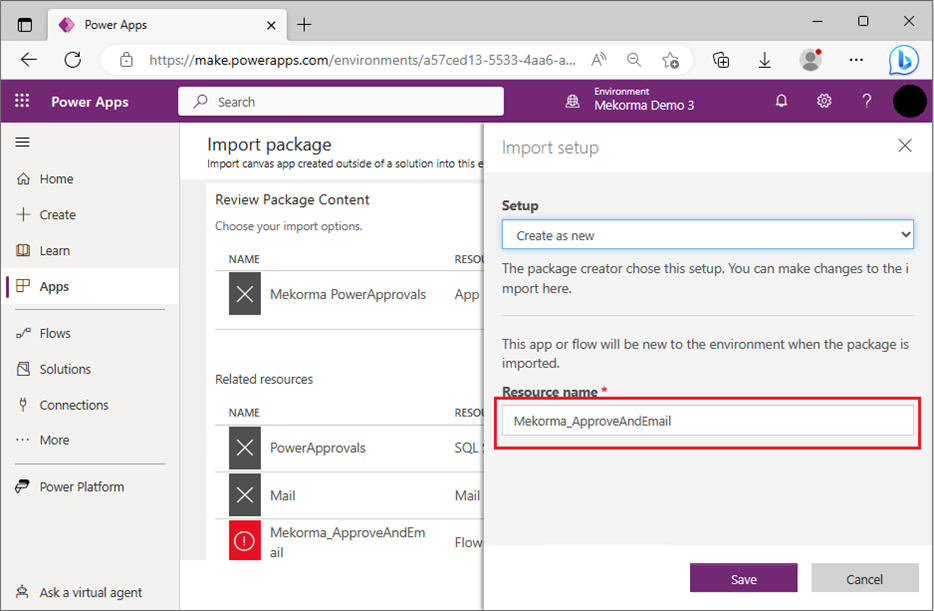
- Set the Setup drop-down as Create as new and leave the default resource name. Click Save to finalize the setup.
![]()
- To set up the flow, click the wrench icon for Mekorma_ApproveAndEmail.
Finalize Power Approvals Import
- Finalizing
-
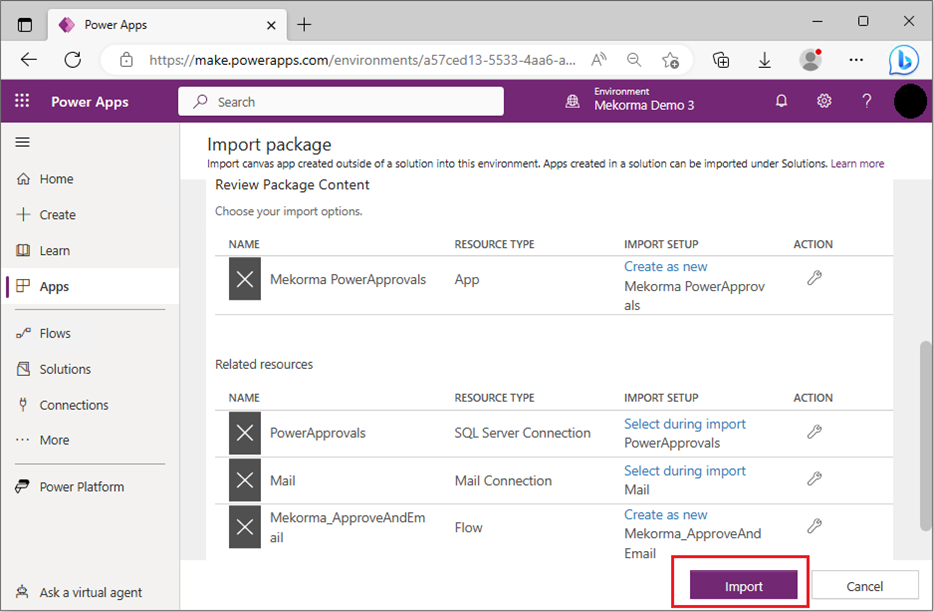
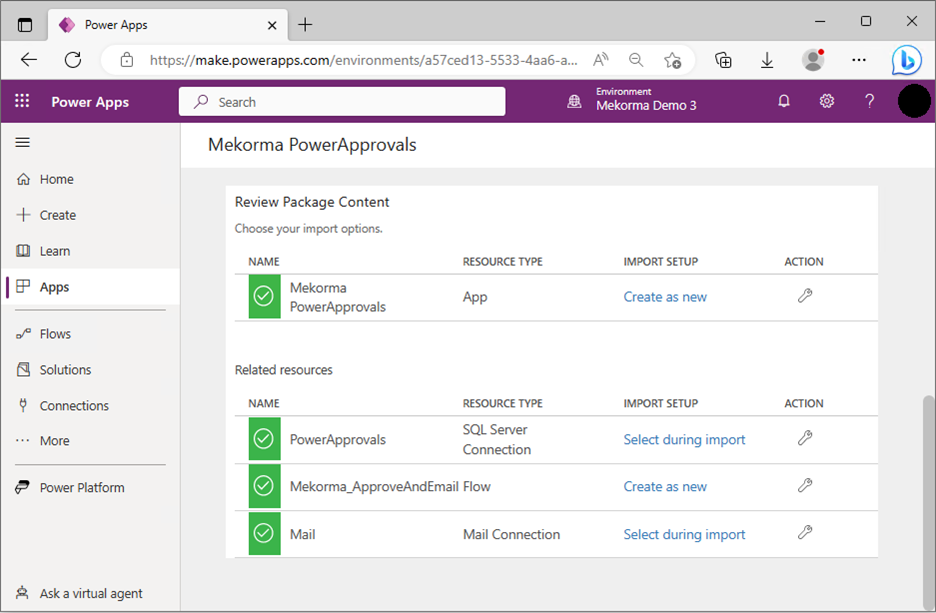
- When you are ready to finalize importing Power Approvals, your window should look like this:
![]()
- Click Import to finalize the setup. Allow the system to finish importing; the process will take a few minutes and you will see this status while it is working.
![]()
- Once the import is complete, the resources on your page will be updated with a green checkmark next to them.
![]()
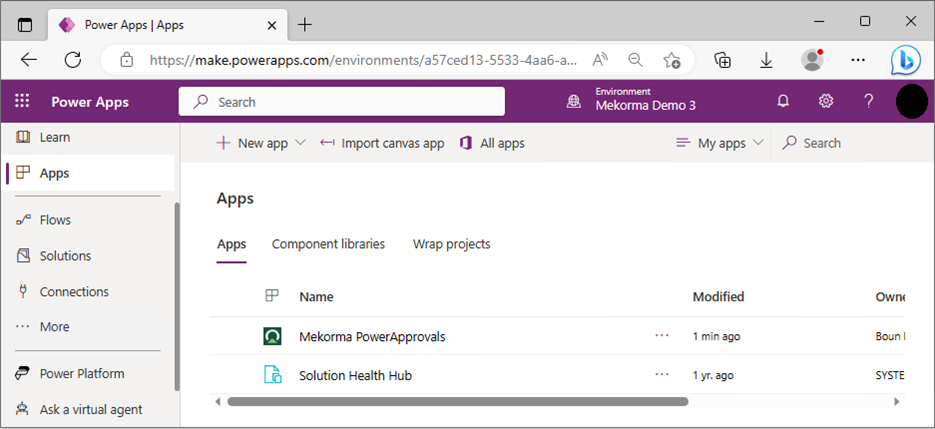
- Open Apps to verify that Power Approvals has been imported into your Power Apps environment.
![]()
- When you are ready to finalize importing Power Approvals, your window should look like this:

- Turning on the Flow
-
By default, Microsoft has the flow deactivated. Follow the instructions below to turn it on
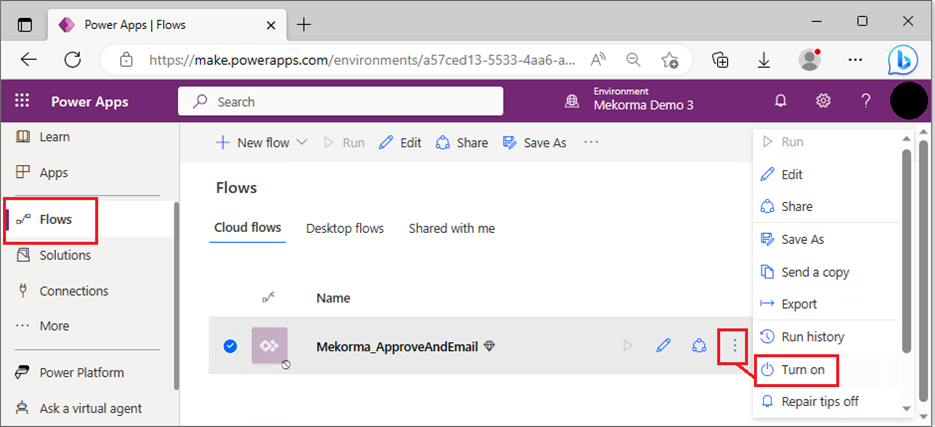
- Select Flows in the left-hand navigation pane. Note that Mekorma_ApprovalAndEmail flow is greyed out because it defaults to be turned off.
![]()
- Click the ellipsis to view additional options and select Turn On.
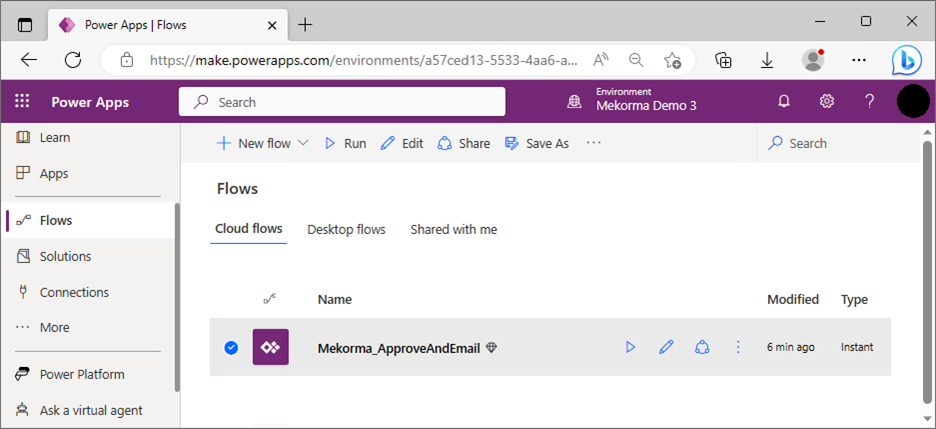
- The flow is now turned on and ready to use.
![]()
- Select Flows in the left-hand navigation pane. Note that Mekorma_ApprovalAndEmail flow is greyed out because it defaults to be turned off.
Last modified:
September 23, 2024