As of Mekorma Build x81, you can set up print tasks on a system, company, or on a per-user basis for payments printed from the Action Board.
The Action Board’s automation capabilities require that a printer is pre-defined. Where proper functioning previously depended on GP’s Named Printers, now users can select / change default printers just prior to printing. This makes it particularly useful if you use redirected or session printing because printers can be selected right from the Action Board itself.
- Action Board printer selection overrides Named Printers configuration.
- When the Action Board printer selection is configured, user settings override company settings > company settings override System / Default printers.
System / Default printer selection
To configure default Action Board printers that apply to all companies and for all users, follow these steps:
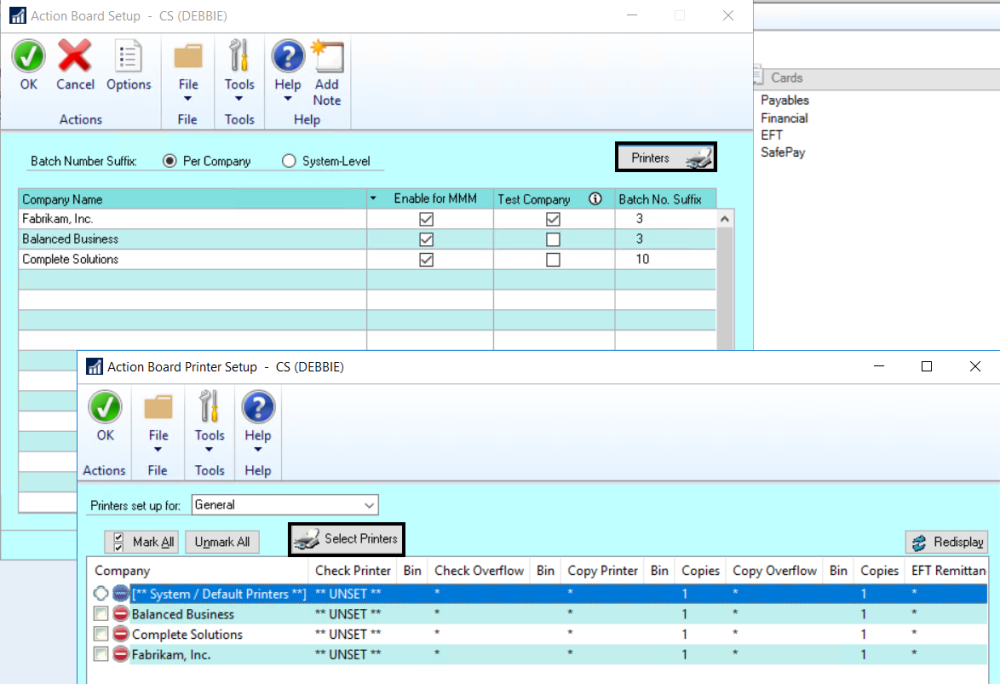
- Open the Action Board Setup window and click on the Printers button. This will open the Action Board Printer Setup window.

- Select System / Default printers.
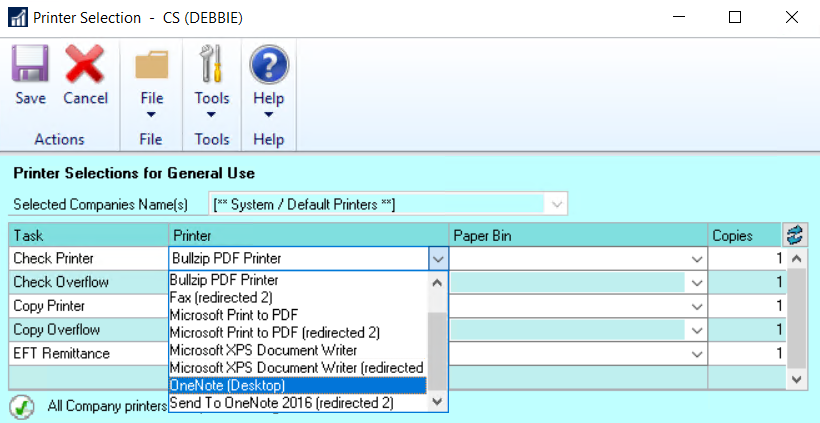
- Click on the Select Printers button to open the Printer Selection window.
- Using the drop-down in the column labeled Printer, choose the printer you’d like to designate for each needed printing task:
- Check Printer
- Check Overflow
- Copy Printer
- Copy Overflow
- EFT Remittance
You can also assign a Paper Bin in the second column.

- Save the settings. The default printer setting will then apply to all companies. When processing payments from the Action Board, checks and EFT remittances for all companies will print from the System/ Default printer.
Company-level printer selection
To configure default Action Board printers for individual companies that apply to all users, follow these steps:
- Open the Action Board Setup window and click on the Printers button. This will open the Action Board Printer Setup window.

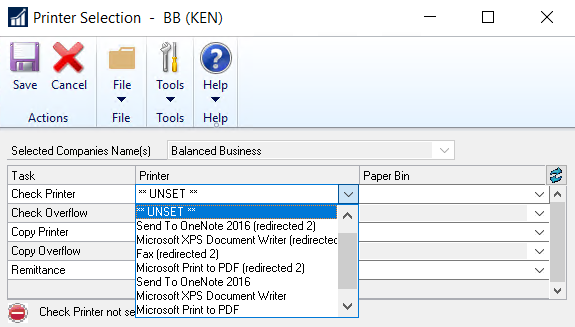
- Select a company, or choose multiple companies that should have the same printer assignments.
- Click on the Select Printers button to open the Printer Selection window.
- Using the drop-down in the column labeled Printer, choose the printer you’d like to designate for each needed printing task:
- Check Printer
- Check Overflow
- Copy Printer
- Copy Overflow
- EFT Remittance
You can also assign a Paper Bin in the second column.

- Save the settings. The printer specified will only apply to payments printed for that company, for the specific tasks configured. Company settings will override System / Default printer settings.
User-level printer selection
Users can configure their own printers directly from the Action Board itself, which makes it easy to choose the correct redirected or session printers prior to printing:
- Open the Action Board and click on Options to open the Action Board Options window.
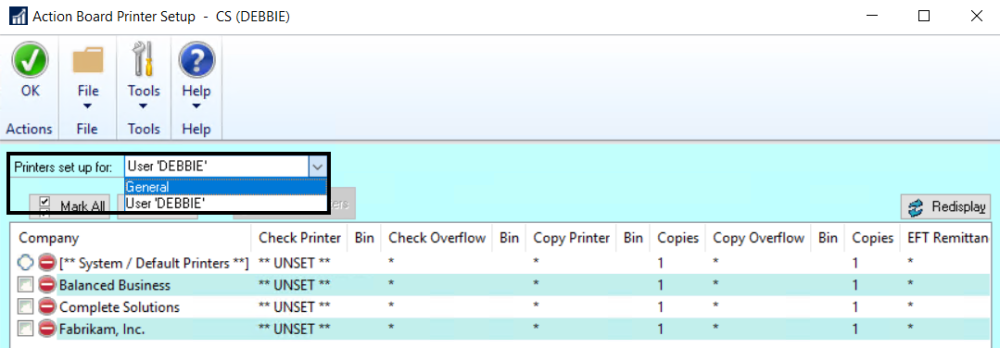
- In the Options window, click on Printers to open the Action Board Printer Setup window.
- By default, the User ID of the person currently signed in will populate the Printers set up for. Be sure that your User ID is selected if you want to configure your own printer settings. It’s also possible to choose ‘General’, which will apply the printer settings to all users.

- Choose either System / Default printer to apply your individual settings across all your GP companies. Or, choose one or multiple companies to customize the printer selection. Click the Select Printers button to open the Printer Selection window.
- You can adjust the company selection using the drop-down:

- Using the drop-down in the column labeled Printer, choose the printer you’d like to designate for the selected companies corresponding to each needed printing task:
- Check Printer
- Check Overflow
- Copy Printer
- Copy Overflow
- EFT Remittance
You can also assign a Paper Bin in the second column.

- Save the settings. The printers specified will only apply to payments printed by that user, for the specific tasks configured. User settings will override Company and System / Default printer settings.
Need more help with this?
We value your input. Let us know which features you want to see in our products.

