
Once Named Printers have been set up, you can now assign different printers for MICR checks, check copies, overflows and EFT remittances in the Assign Named Printers window:
- Log in as System Administrator (‘sa’).
- Navigate to the Assign Named Printers window (Microsoft Dynamics GP drop-down menu > Setup > System > Named Printers).
- Choose 3rd Party from the Task Series drop-down menu.
![]()

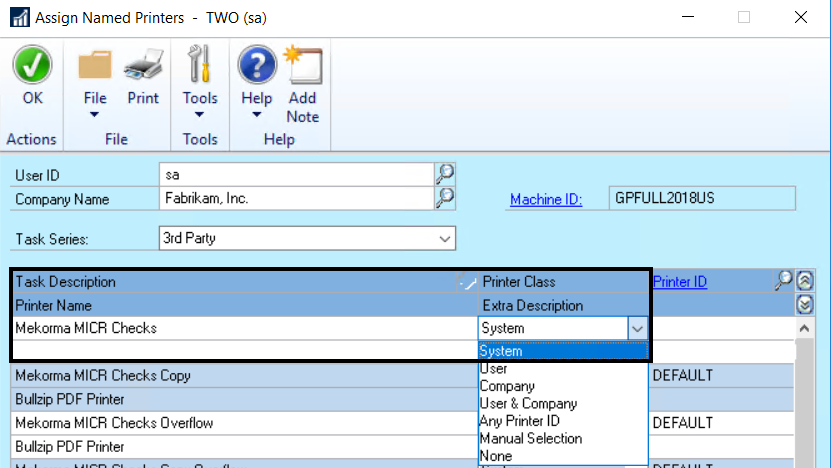
- Click on a Mekorma Task Description. Example: Mekorma MICR Checks
- Select the Printer Class you’d like for that task. Example: System
![]()
- The Named Printers window will open, listing available printers within the System Printer Class – click on the desired printer, then Select. Example: CHECKS
![]()

- The Named Printer has now been assigned to that particular Task.
If I want to use a printer that is designated with the User & Company Printer Class, I must choose the correct User ID and Company Name in the fields at the top of the window. Example: The APFABRIKAM Printer ID assigned to Debbie in Fabrikam:
![]()

Last modified:
July 14, 2021
Need more help with this?
We value your input. Let us know which features you want to see in our products.