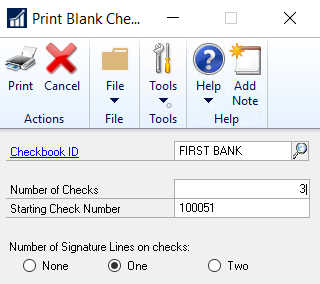
Blank checks are not posted to the General Ledger when they are printed. To record them, they must be entered later as manual payments. Though the blank checks are not recorded at the time of printing, if the default starting check number is used, the Next Check Number field for the checkbook will be advanced by the number of checks printed. This can lead to missing check numbers if one or more of the blank checks are never entered as manual payments.
To avoid this, change the starting check number for the blank check batch. This prevents the Next Check Number from advancing. When printing blank checks, only one check Approver is required, but the approver must be assigned to the checkbook you are printing the blank checks from.
To open the Print Blank Checks window, go to the Mekorma Area Page > Transactions > Payables > Print Blank Checks
- Open the Print Blank Checks window.
- Enter the Checkbook ID and the Number of Checks you would like to print. If desired, enter a different Starting Check Number for the batch of blank checks you plan on printing.
- Select the number of Signature lines to print on each check. Signature lines are blank lines upon which a signature can be written.

- Click Print. After entering any required User IDs and/or Passwords, the Mekorma MICR Check Printing window will open.
- Enter your print settings and click Print when you are ready to print checks.
Need more help with this?
We value your input. Let us know which features you want to see in our products.

