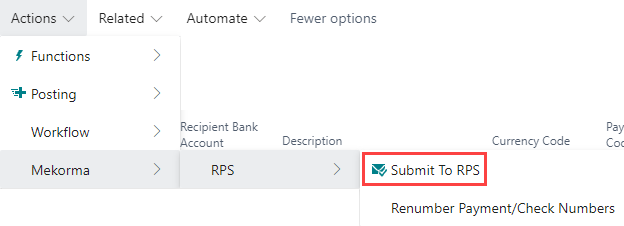
When you have one or more invoices ready to pay, navigate to Payment Journals and select your remote payment service provider—in this scenario, Corpay—from the General Journal Template List to create a Remote Payment Services-specific payment batch.
You now have a new batch ready to start adding invoices to.
When submitting remote payment services payments, the Payment Journals page functions like standard payments. However, there are a few key differences: the top fields contain the batch name, status, and description.
- Batch Name is automatically created according to your batch numbering sequence configuration. In this case, our batch name is MV1.
- RPS Status:
- Created: Batch created and awaiting processing/submission
- Processing: Submitted to Remote Payment Services but awaiting a response
- Processed: Successfully submitted to and processed by the remote payment service provider. You can now post the payment batch in Business Central.
- RPS Status Description defines the current status of the payment batch. It provides more information when a Remote Payment Services submission failure occurs.
Build remote payment batches the same as you normally build payment batches. Once the batches are built and ready to submit, the process differs from standard payments:
- Before you submit a remote payment, you need to preview the post. Click Preview Posting. Note that each time a payment is changed in any manner, you need to preview the post once again to continue.
- You will be prompted with a successful submission. If the status is something other than Processed, Processing, or Successful, refer to Handling Errors with Mekorma Remote Payment Services.
- Your remote payment service provider will process the payment batch. There is a time delay for processing, which can take a couple minutes. To check for an update to the batch status, refresh the page.
- Once the status has updated to Processed, you will be able to post the batch in Business Central by clicking Post from the header menu. Once the batch is posted, a new, blank batch is automatically created.
Note: If you deleted any payment lines from the batch, you may need to renumber your payment/check numbers at your next payment. Learn about renumbering and how to use it in your workflow.
Need more help with this?
We value your input. Let us know which features you want to see in our products.


