Before validating a large batch of vendor records, we recommend starting with a small sample to assess processing time. Vendor validation connects to three different providers (for TIN, OFAC, and address), so this process may take up to 3 minutes. The current Business Central session will be temporarily unavailable while the Vendor Validation process is happening. You can open a new browser tab to continue other Business Central operations while the validation runs.
The first time you validate a group of vendors, we recommend the following configuration in the Vendor Validation Setup page: Set the Block Vendor for Payment field for each type of validation to Never to start.
By choosing to not place vendors on hold when there are validation issues, you can validate your vendors (either individually or en masse), see the result of the validation, and decide how to act without affecting vendor status. This option is better for customers whose vendor data is not in great shape.
Validating multiple vendor records
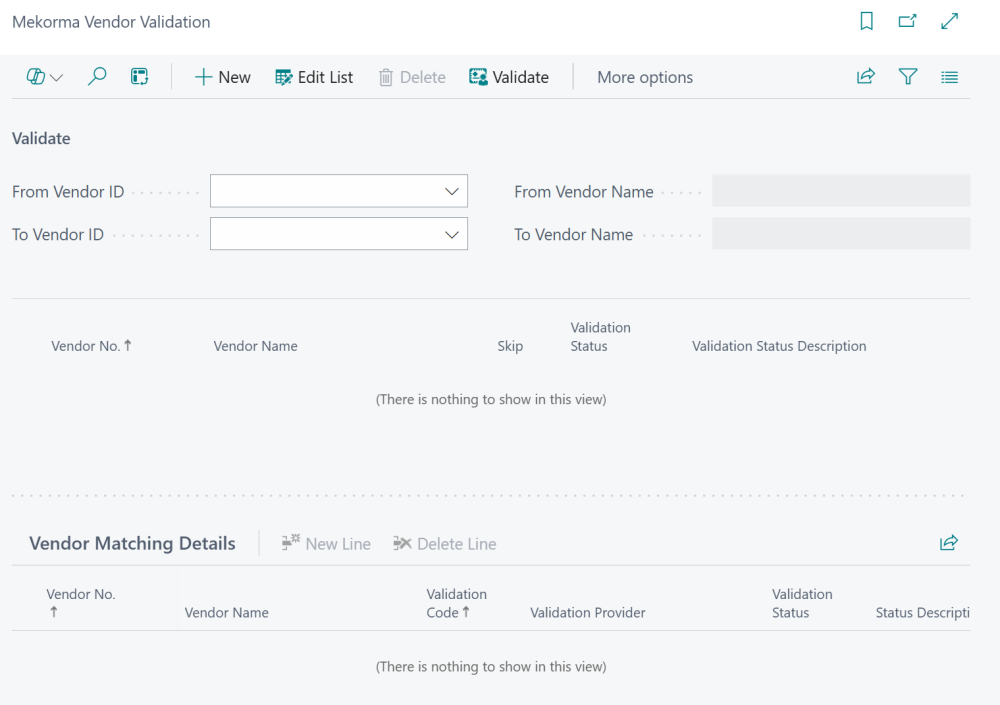
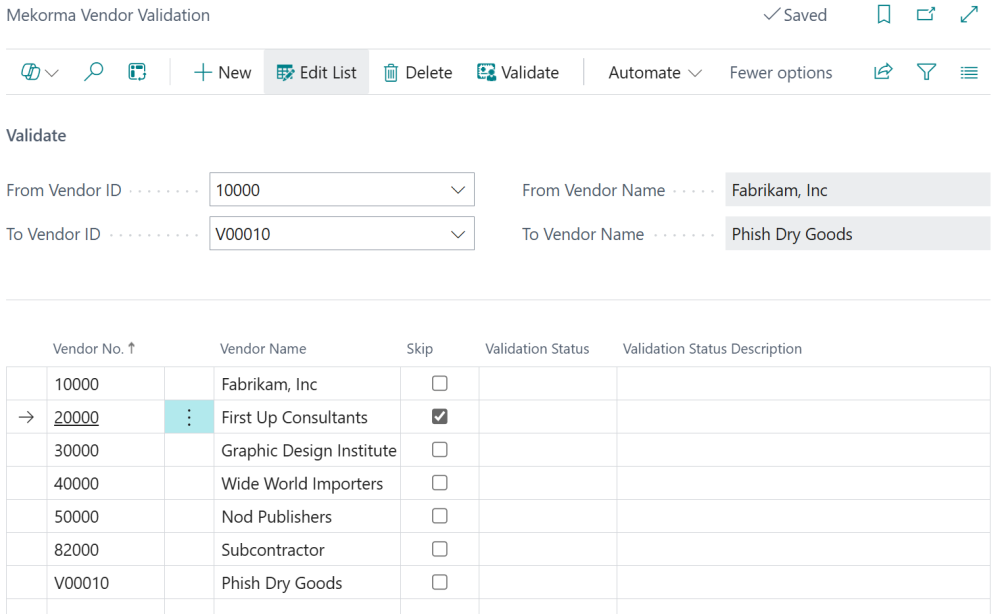
- Find vendors to validate by entering a range of Vendor IDs in the From Vendor ID and To Vendor ID fields. Enter the same vendor ID in both fields to validate just one vendor.
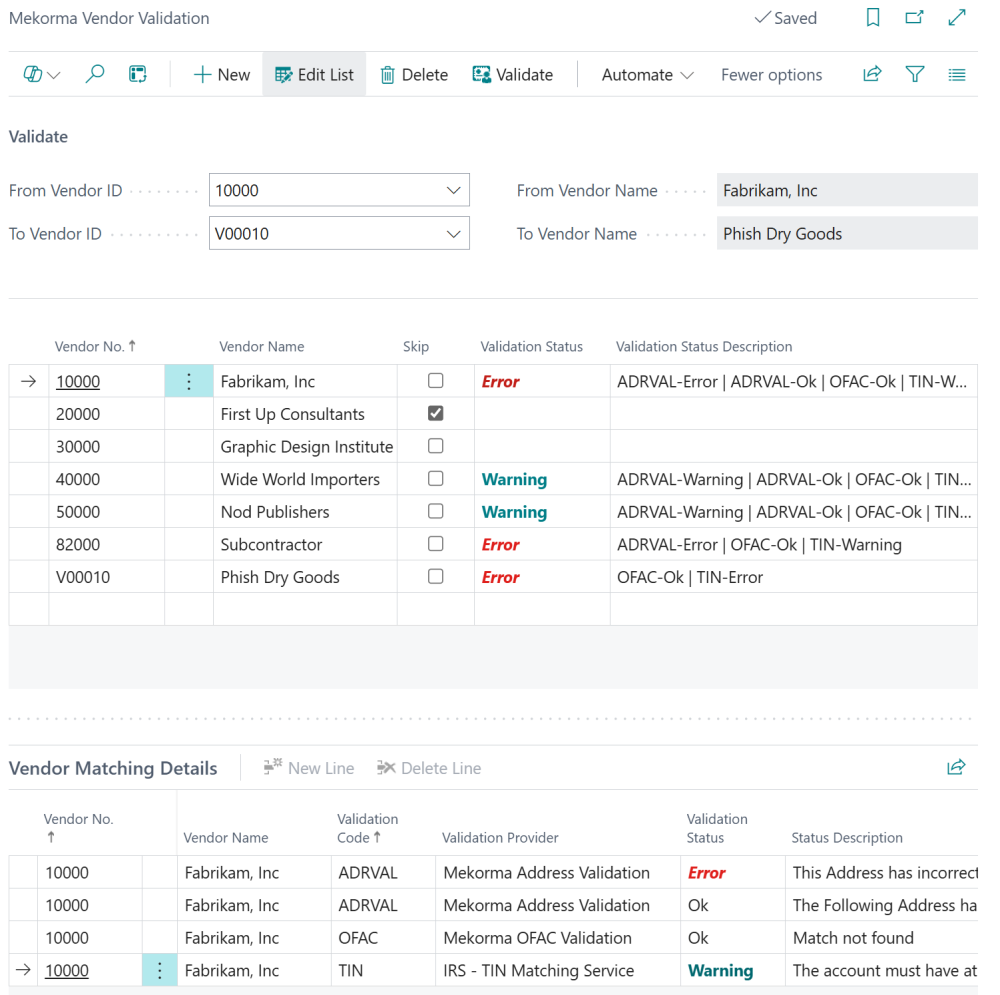
- Click Validate. The top portion of the results displays the overall validation results for each vendor. If this is your first time running a validation, you will be prompted to allow the Mekorma Payment Hub extension to connect to an external service. Click Allow Always to enable the service without receiving future alerts.
Note: Vendors either marked to be skipped or who are excluded from all validation provider options (in the vendor card) still display, but their results will be empty (see First Up Consultants and Graphic Design Institute).
- To see further details of the validation for a specific vendor, review Vendor Matching Details. Select a vendor from the top results and their validation results display in this area. Here you can better understand why your vendor may have failed a specific validation. For example, if they failed the TIN Match, the Status Description column explains the reason for error.
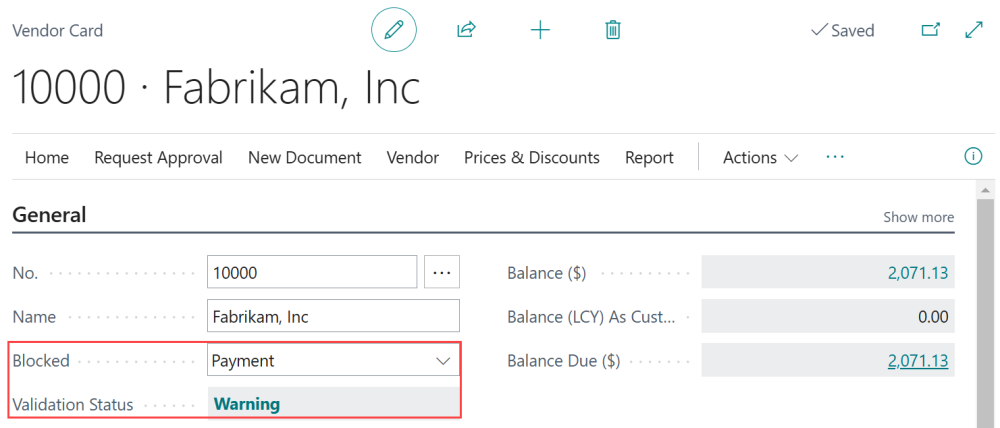
- These validation results, combined with your provider settings, determine the outcome for each vendor. If a vendor receives an error or warning, their status may change, and the Blocked field could change from blank to Payment, indicating that payments are blocked from processing. See Understand Your Validation Results for more information on the post-validation process.
- If a vendor previously had payments blocked and obtains an OK validation status, you must manually update the Blocked field in the vendor card from Payments to blank to resume processing payments.
Need more help with this?
We value your input. Let us know which features you want to see in our products.


