You can validate a single vendor directly from their vendor card.
- Open the vendor card for the vendor you want to validate.
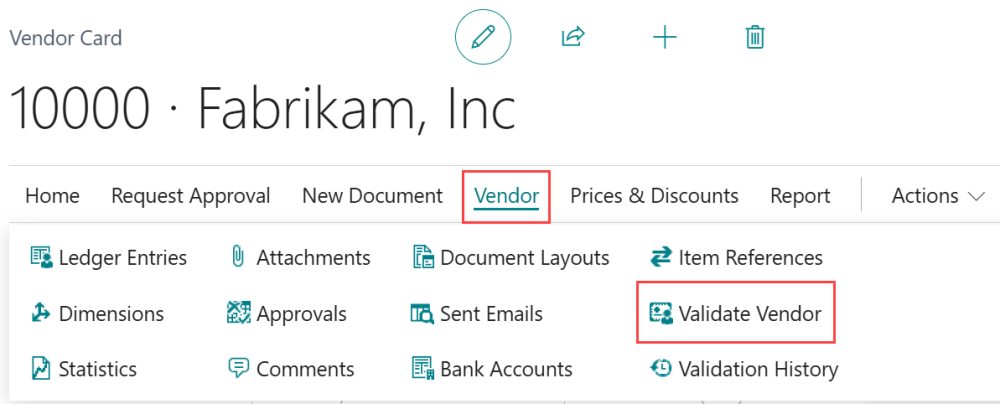
- Click Validate (vendor card > Vendor menu option > Validate Vendor button).
Alternatively, validate from the Actions menu (Actions > Functions > Other > Validate Vendor).
- While the vendor is being validated, the current Business Central session is unavailable. The validation may take up to 3 minutes. You can open a new browser tab to continue other Business Central operations while the validation runs.
- After the validation finishes, review the results:
- The Blocked field may update to indicate an updated vendor payment status.
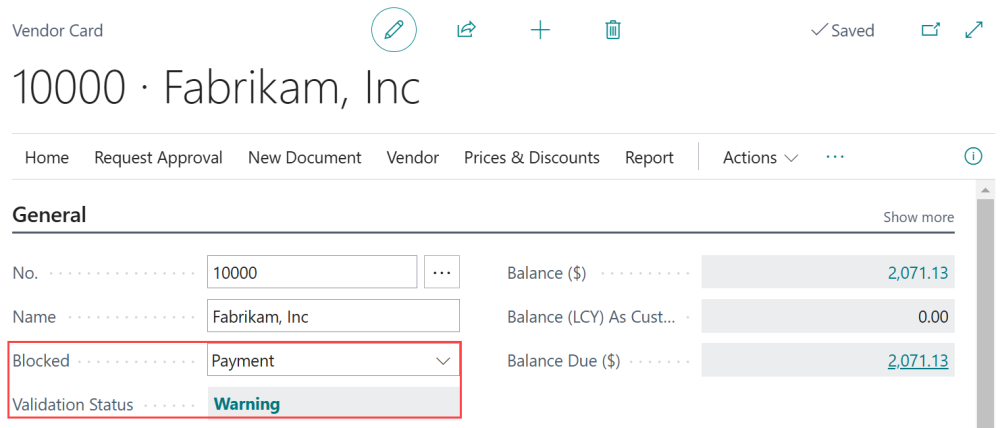
- If the field is blank and the validation status is set to block payments, the Blocked field changes to Payment.
- If the field is already set as Payment or All, it remains at its current status, even if the Validation Status changes to OK.
- The Validation Status field displays the validation outcome.
- The Blocked field may update to indicate an updated vendor payment status.
- If a vendor previously had payments blocked and obtains an OK validation status, you must manually update the Blocked field in the vendor card from Payments to blank to resume processing payments.
If needed, you can manually adjust the vendor’s status regardless of the validation status by selecting the menu next to the Blocked field and updating it. The options are:
- Blank: No payments are blocked. This will automatically be the status if the validation status is OK.
- Payment: This means Mekorma Vendor Validation has set the status to block new payments from processing.
- All: This is a native Business Central setting that can affect your vendor status for various reasons, depending on factors such as compliance, payment status, or tax verification. For more information on blocking a vendor, see Block Vendors – Business Central | Microsoft Docs.
Automatic validation prompts
Whenever certain fields in the vendor card are modified, you will be prompted to run a validation. This ensures that the changes you made are valid. If the vendor is placed on hold as a result of the validation, you can review the details in the Validation History.
Fields that trigger a validation when edited include:
| Name | County |
| Address | Location Code |
| Address 2 | VAT Registration No. |
| City | TIN Matching |
| Post Code | OFAC Screening |
| Country/Region Code | Address Validation |
Excluding Vendors from Validation
To exclude a vendor from a specific validation, refer to Excluding Vendors from Validations.
Reviewing Validation History
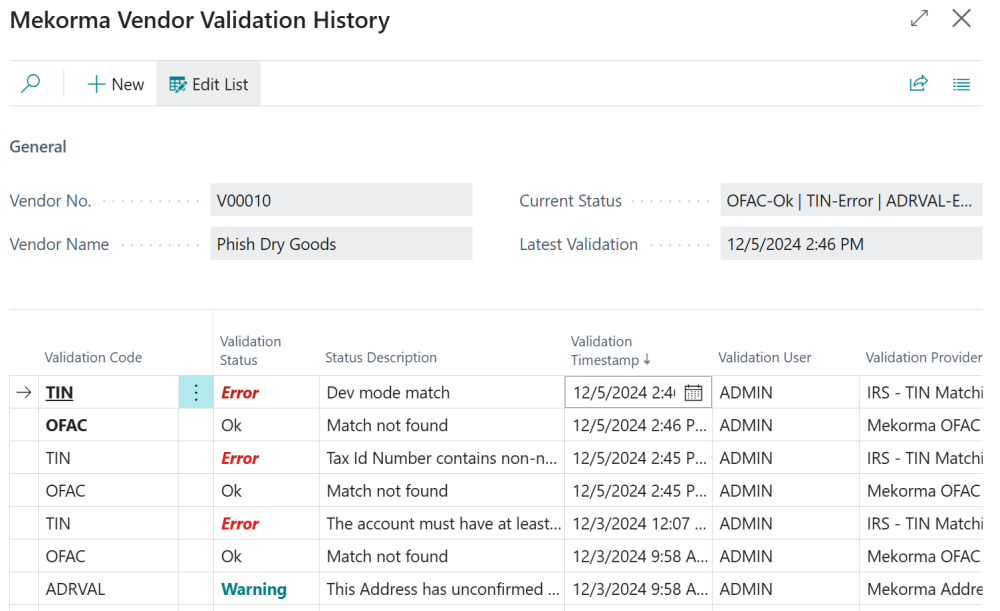
To view past validations for a vendor, navigate to the Validation History on the vendor card (vendor card > Vendor menu option > Validation History button). The most recent validations are at the top of the list and in bold. The history shows all the validations a vendor has been through, including bulk validations and provides all the pertinent information from the validation.

For guidance on interpreting validation results, see Understanding Your Validation Results.
Need more help with this?
We value your input. Let us know which features you want to see in our products.


